Peanut butter chocolate dipped cookies & thoughts on 2020

I meant to share this recipe before the holidays but I just didn’t get around to it. What can I say? This year has been different, to say the least.

Like a lot of people, the start of a new year encourages me to reflect on the year behind me and, without much thought, automatically start thinking of goals and intentions for the upcoming year. This year is a bit different.

Two thousand and twenty. So many of us waved 2019 goodbye and welcomed 2020 with wide and open arms. The hope, the expectation, the new opportunities ahead. Unfortunately, 2020 wasn’t quite what many of us hoped it would be. This last year brought so much pain, loss, isolation, and heartbreak for many and all I can do is feel grateful that both my loved ones and I have for the most part been spared.

Our day-to-day lives have changed in ways I never quite imagined. Some good and some not so good. But if I’ve learned one thing from this long and unique year is to let go of my expectations. This year has forced me to live life at a different pace and let go of overpacked schedules. This year has taught me the importance of rest. This year has taught me that doing nothing is exactly what I need to be doing sometimes.

As I reflect on what 2020 was and look ahead at the upcoming new year, I keep thinking of a question posed by Jocelyn K Glei in her Hurry Slowly podcast – “who are you without the doing?” This last year forced me to surrender my sometimes unhealthy relationship with “productivity” and the value of moving at a slower pace. I’m not sure what the proper farewell to 2020 is but I know that I’ll be heading into the new year with less expectations and with just the intention of being in the moment.

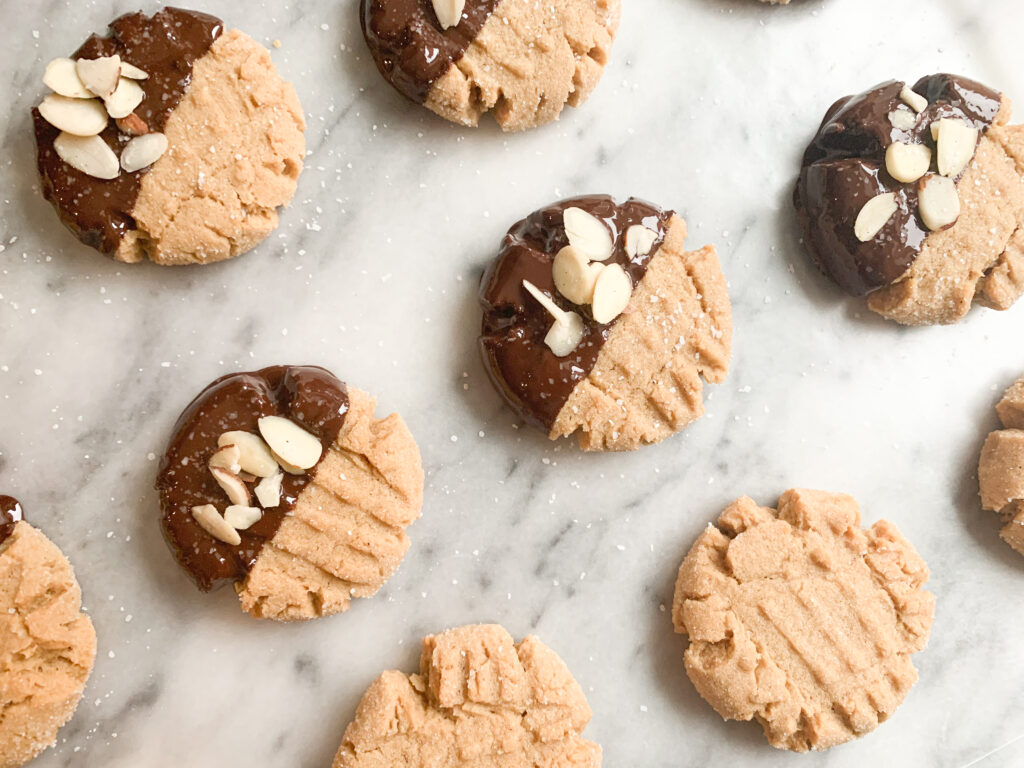
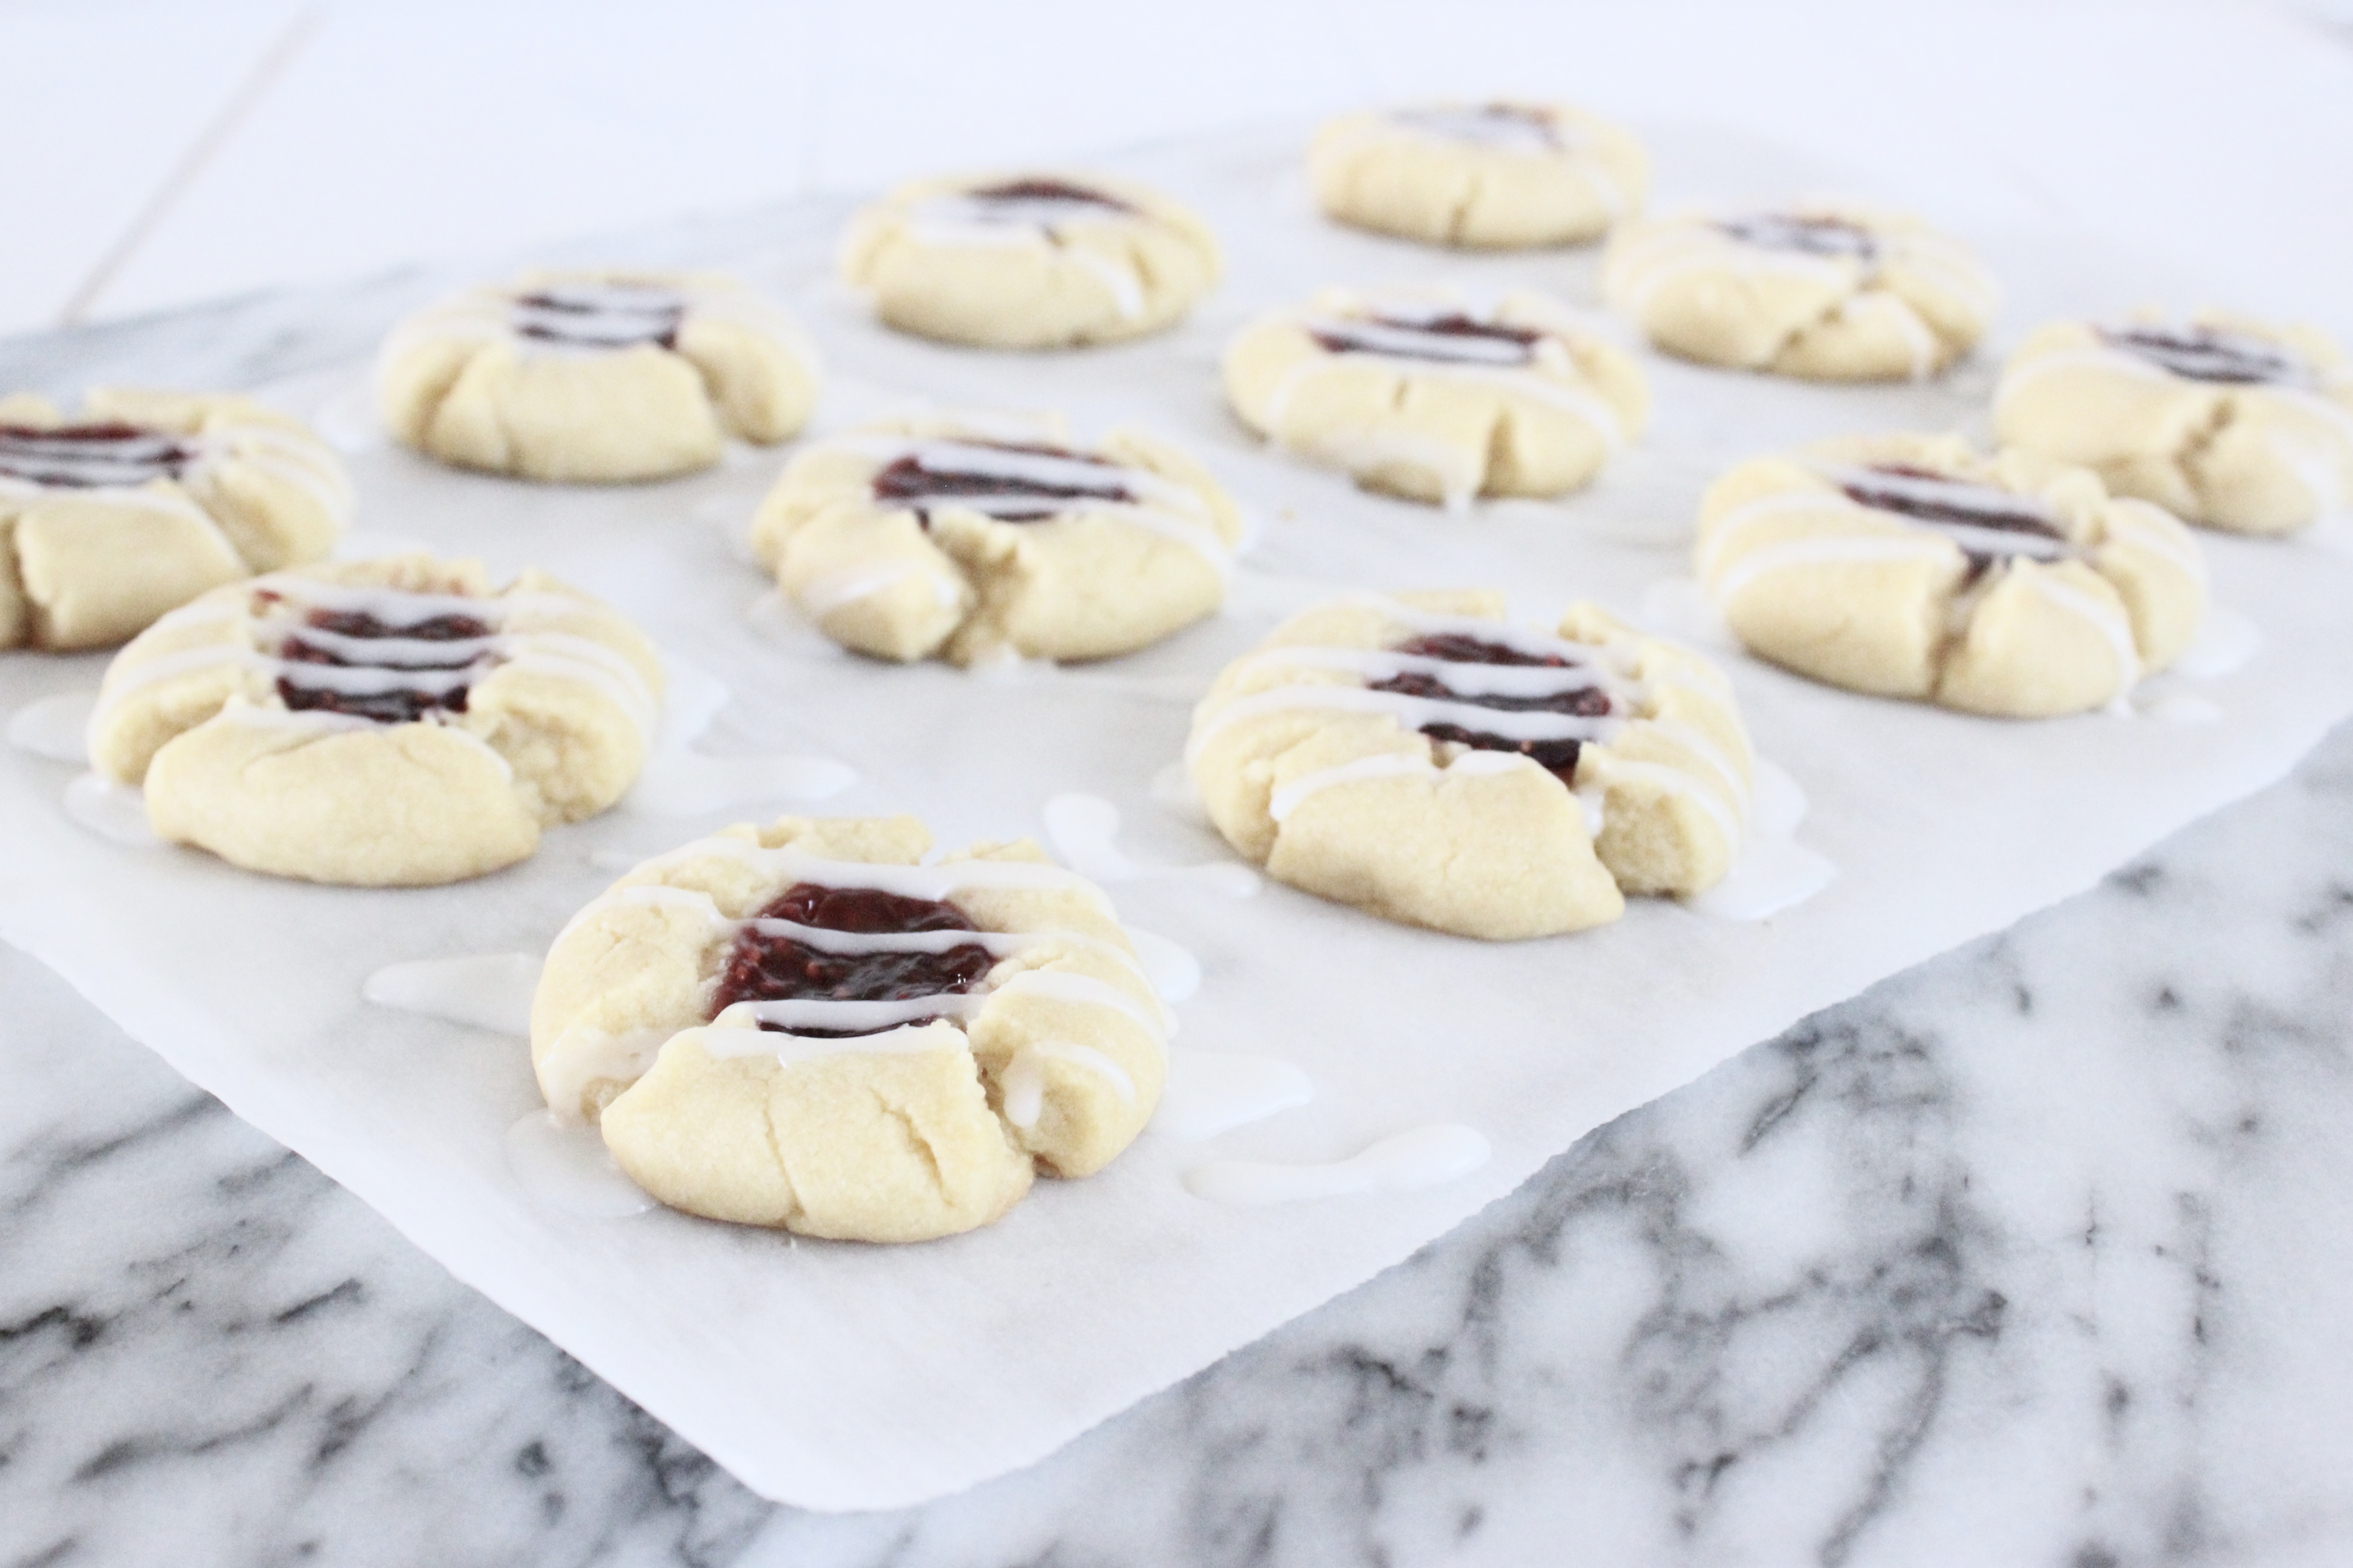
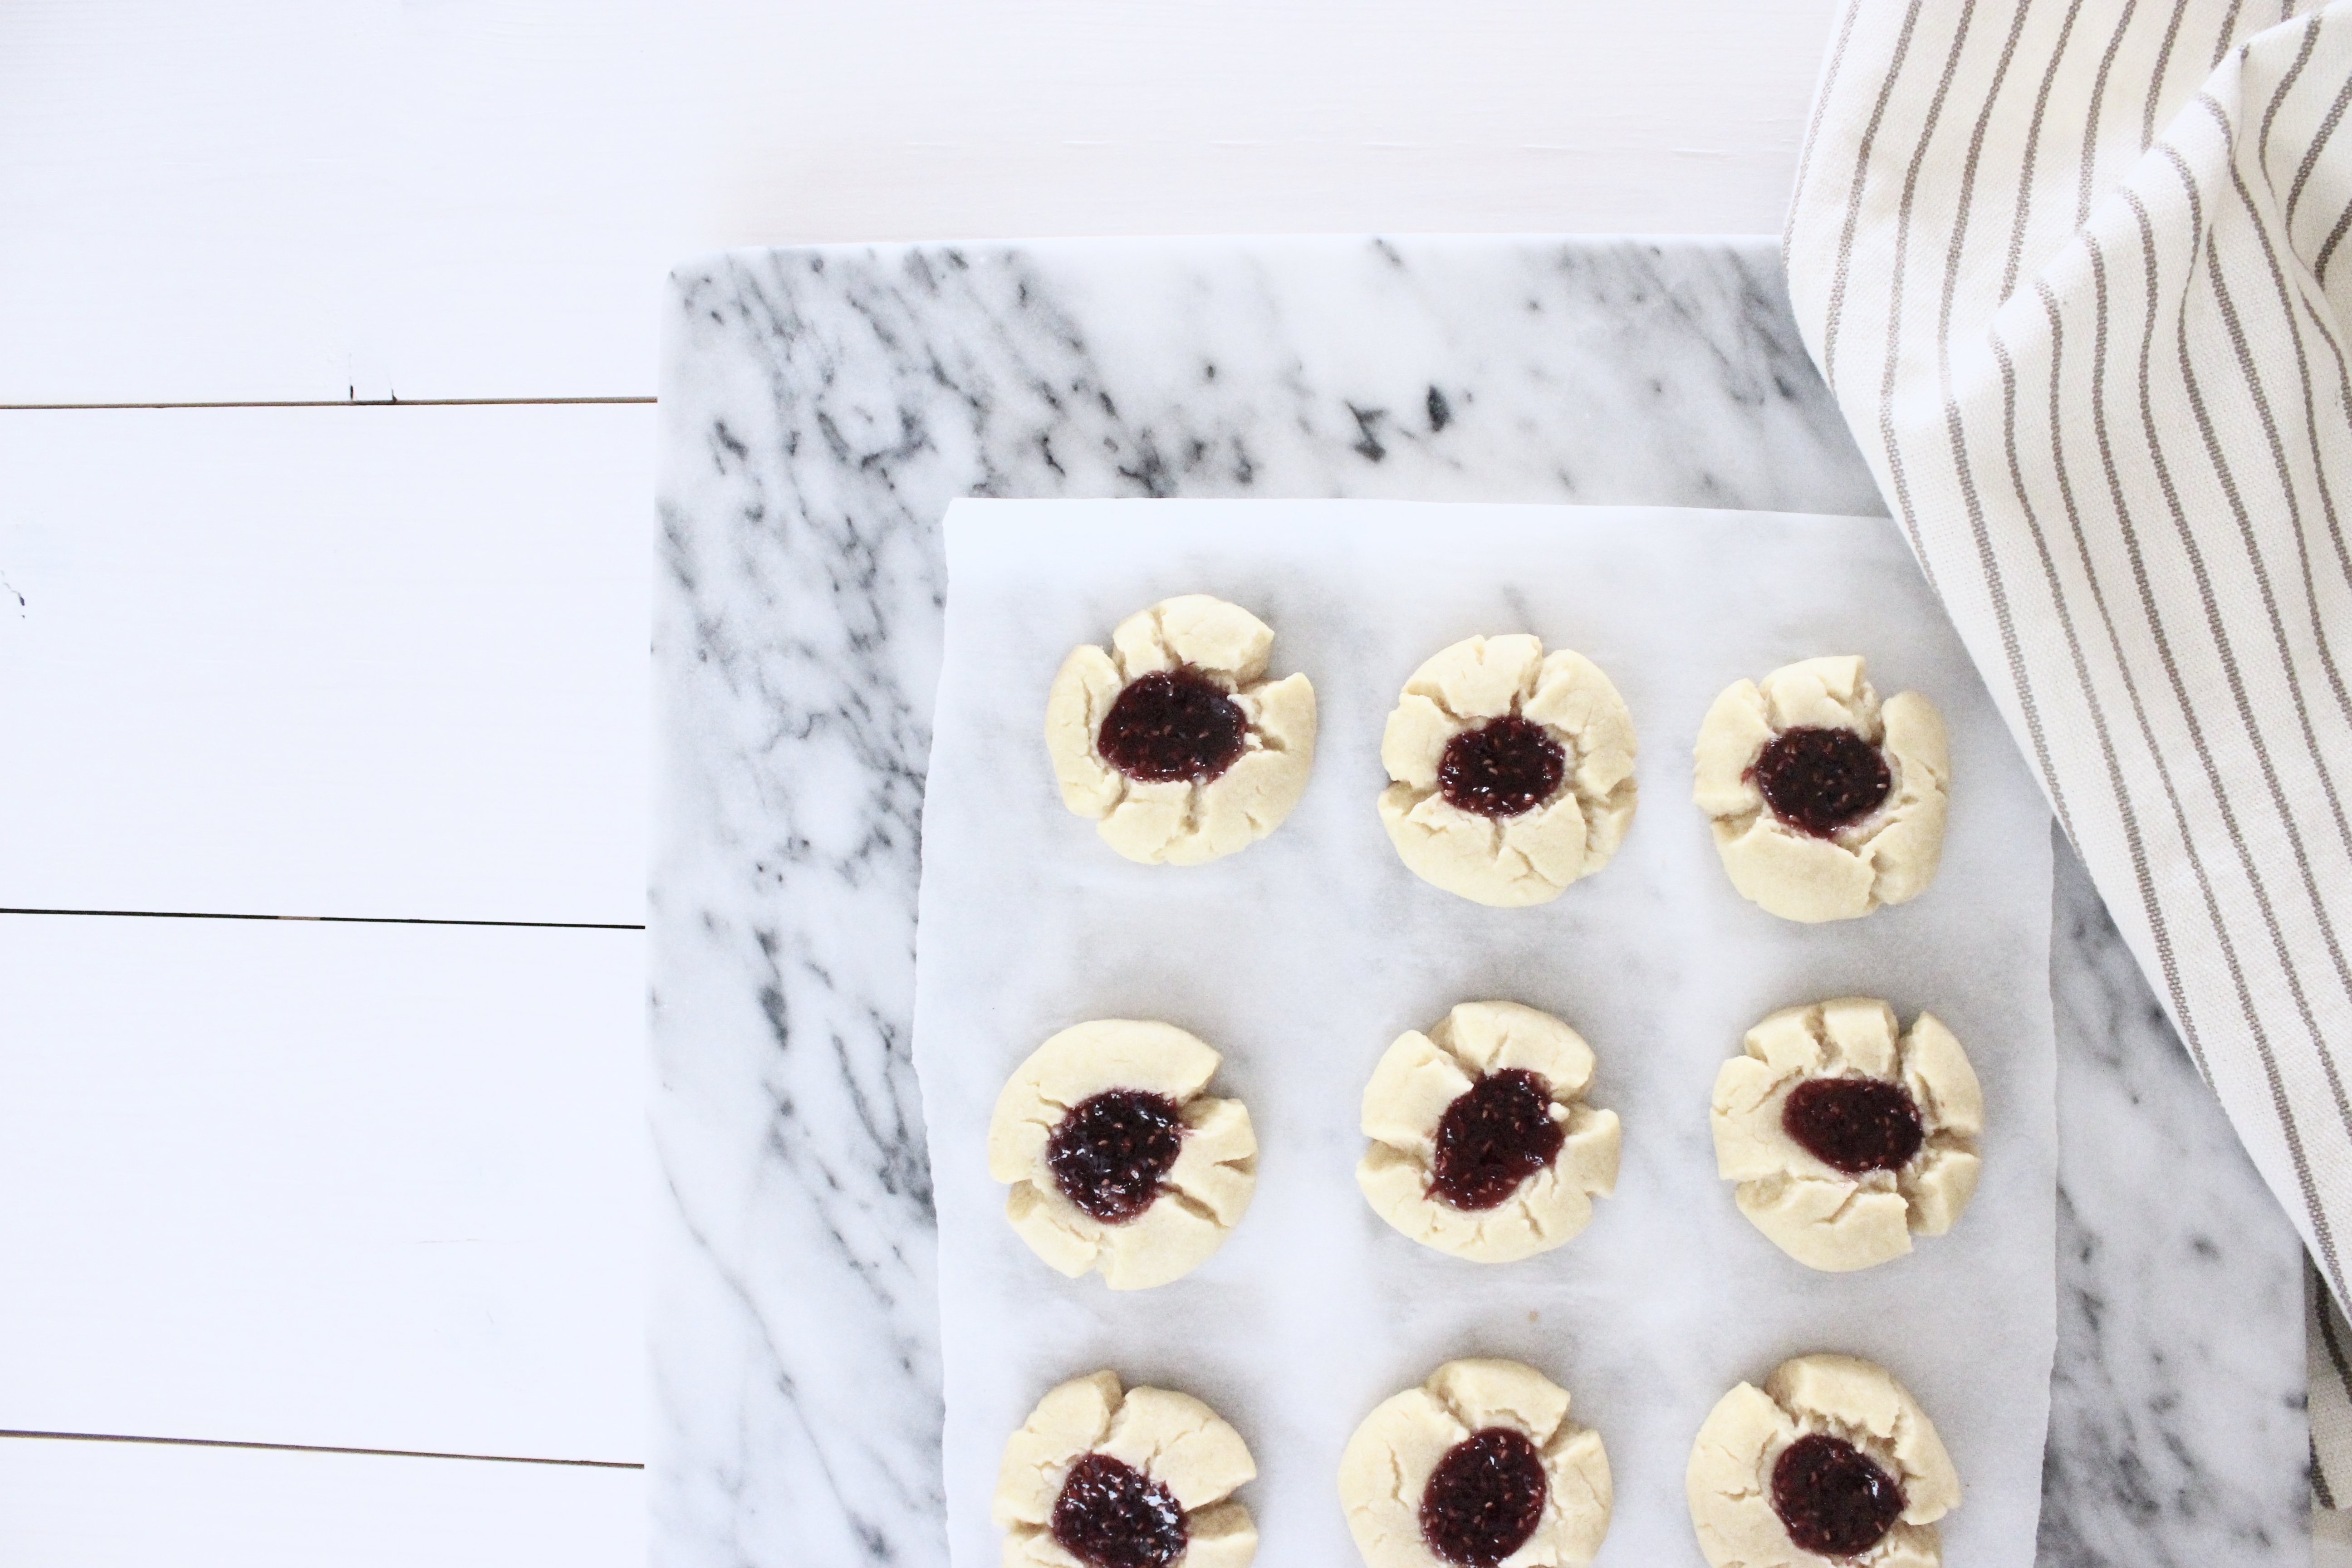
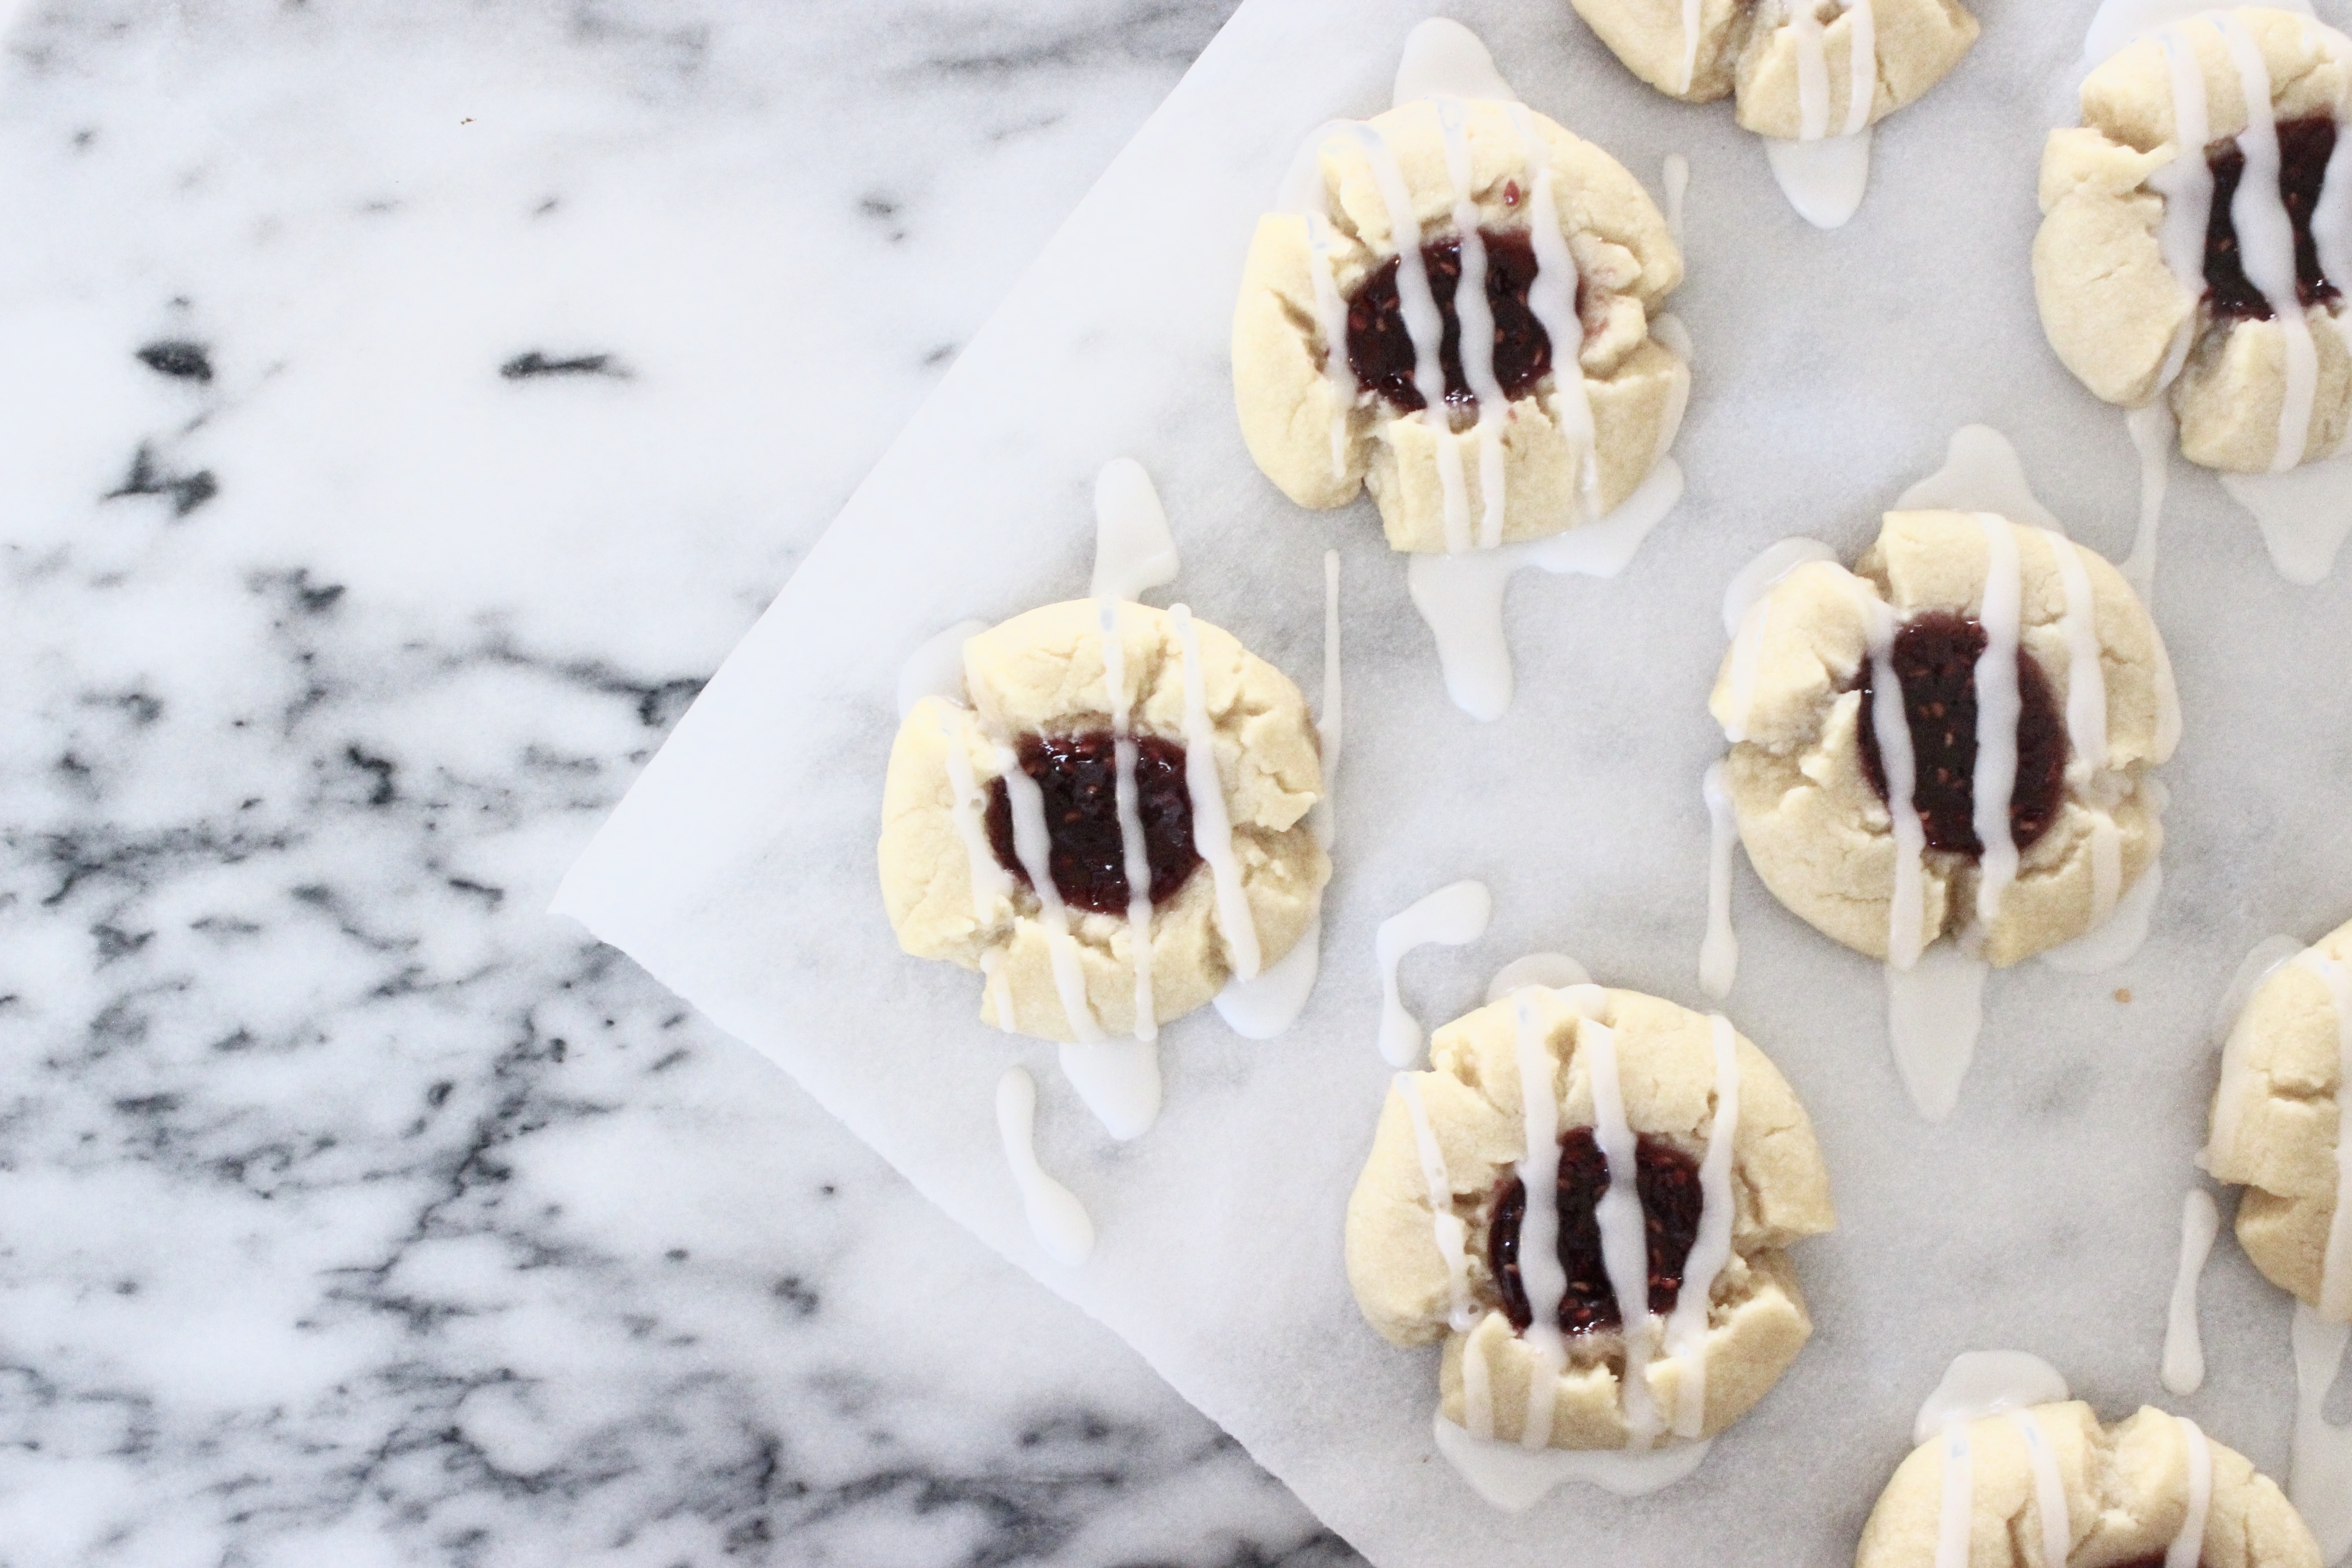
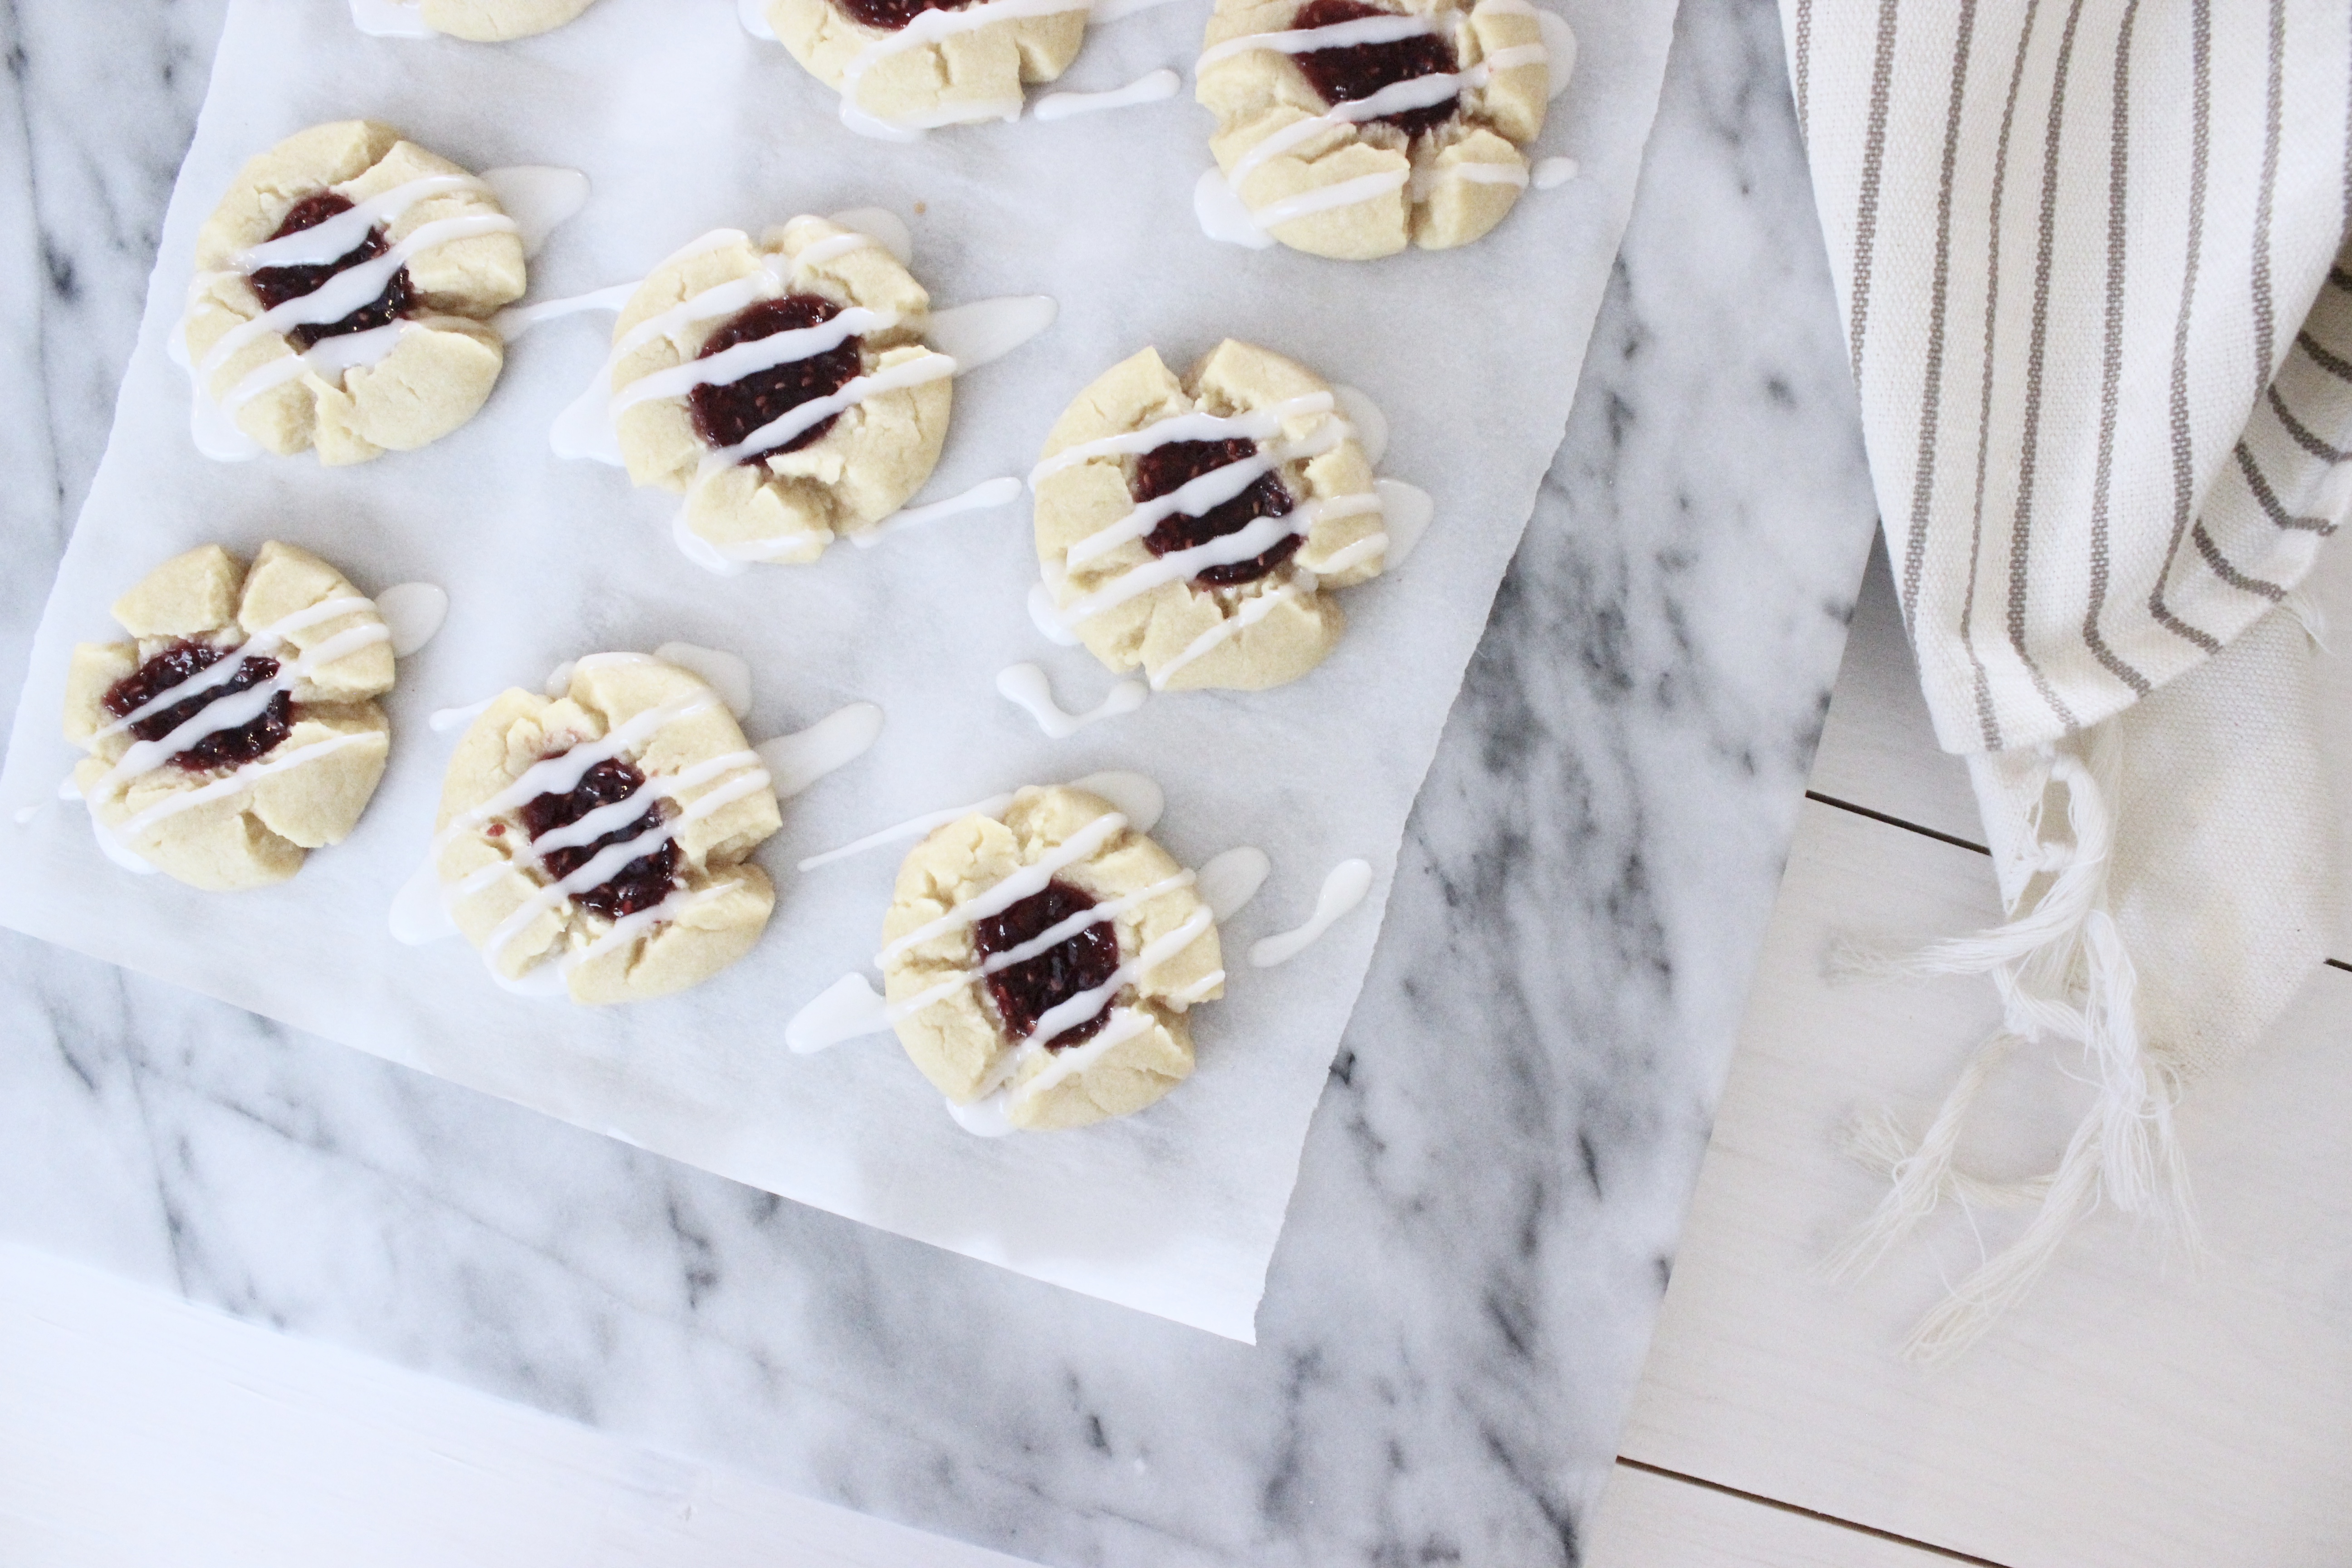
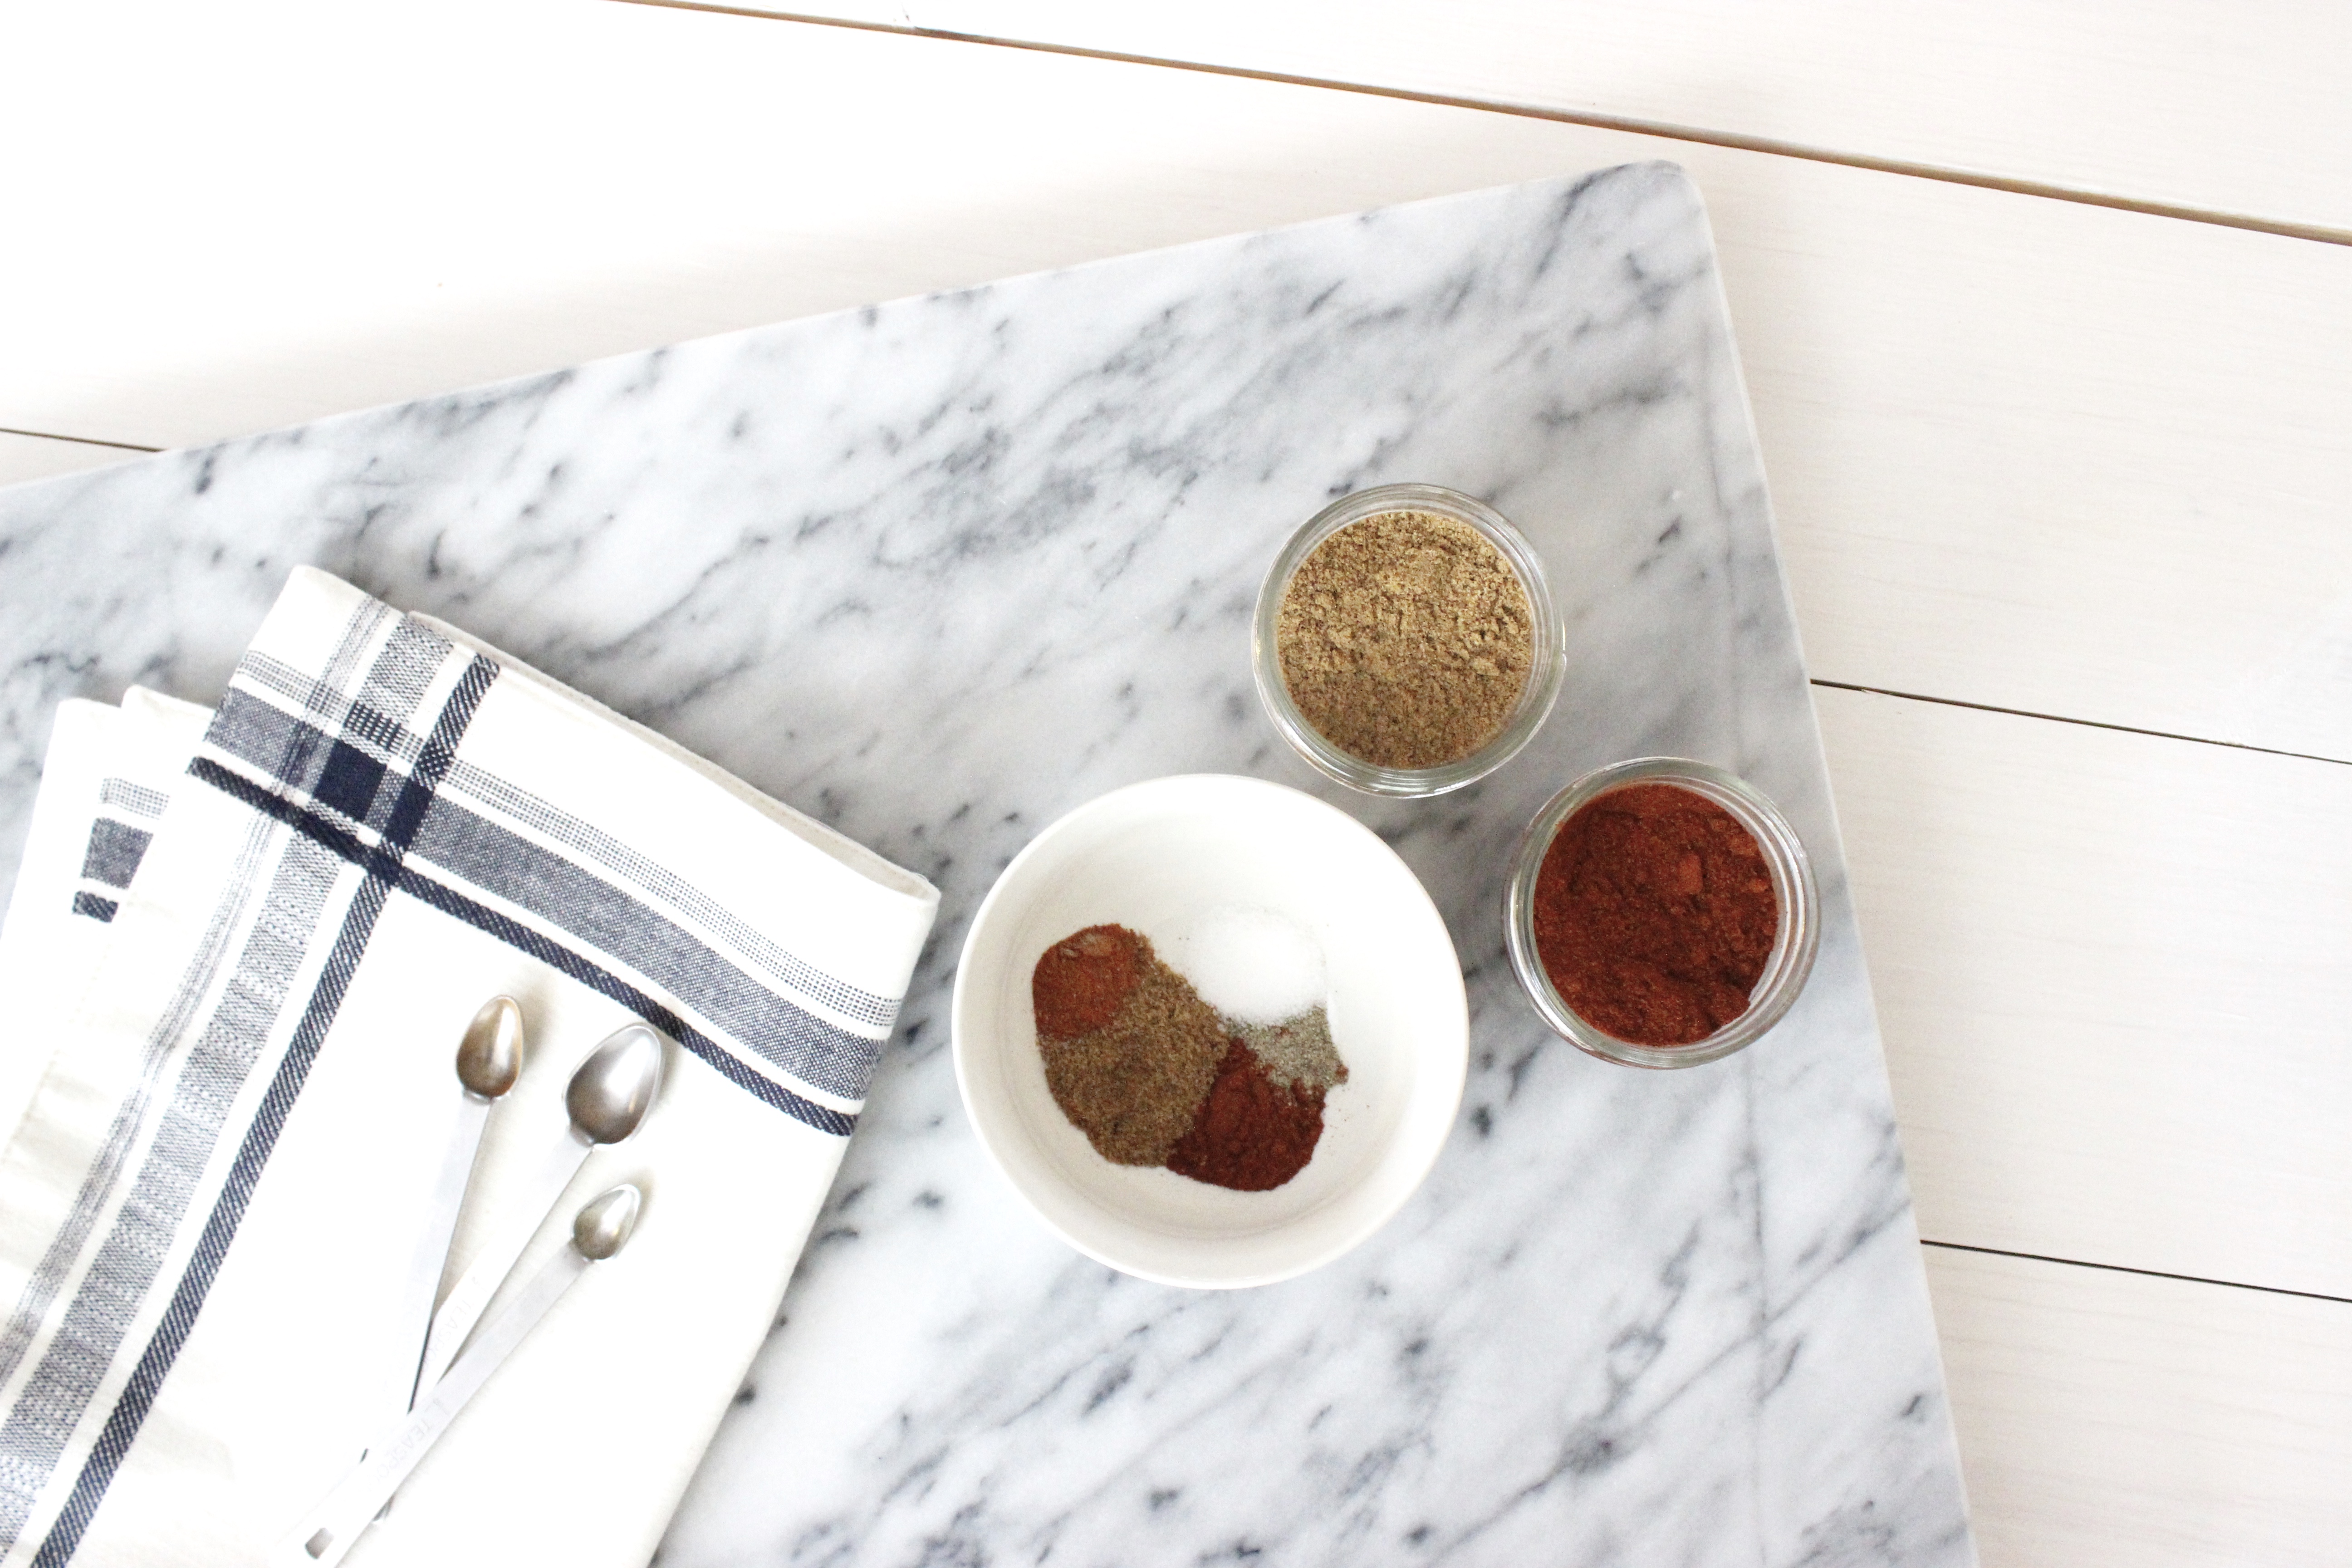
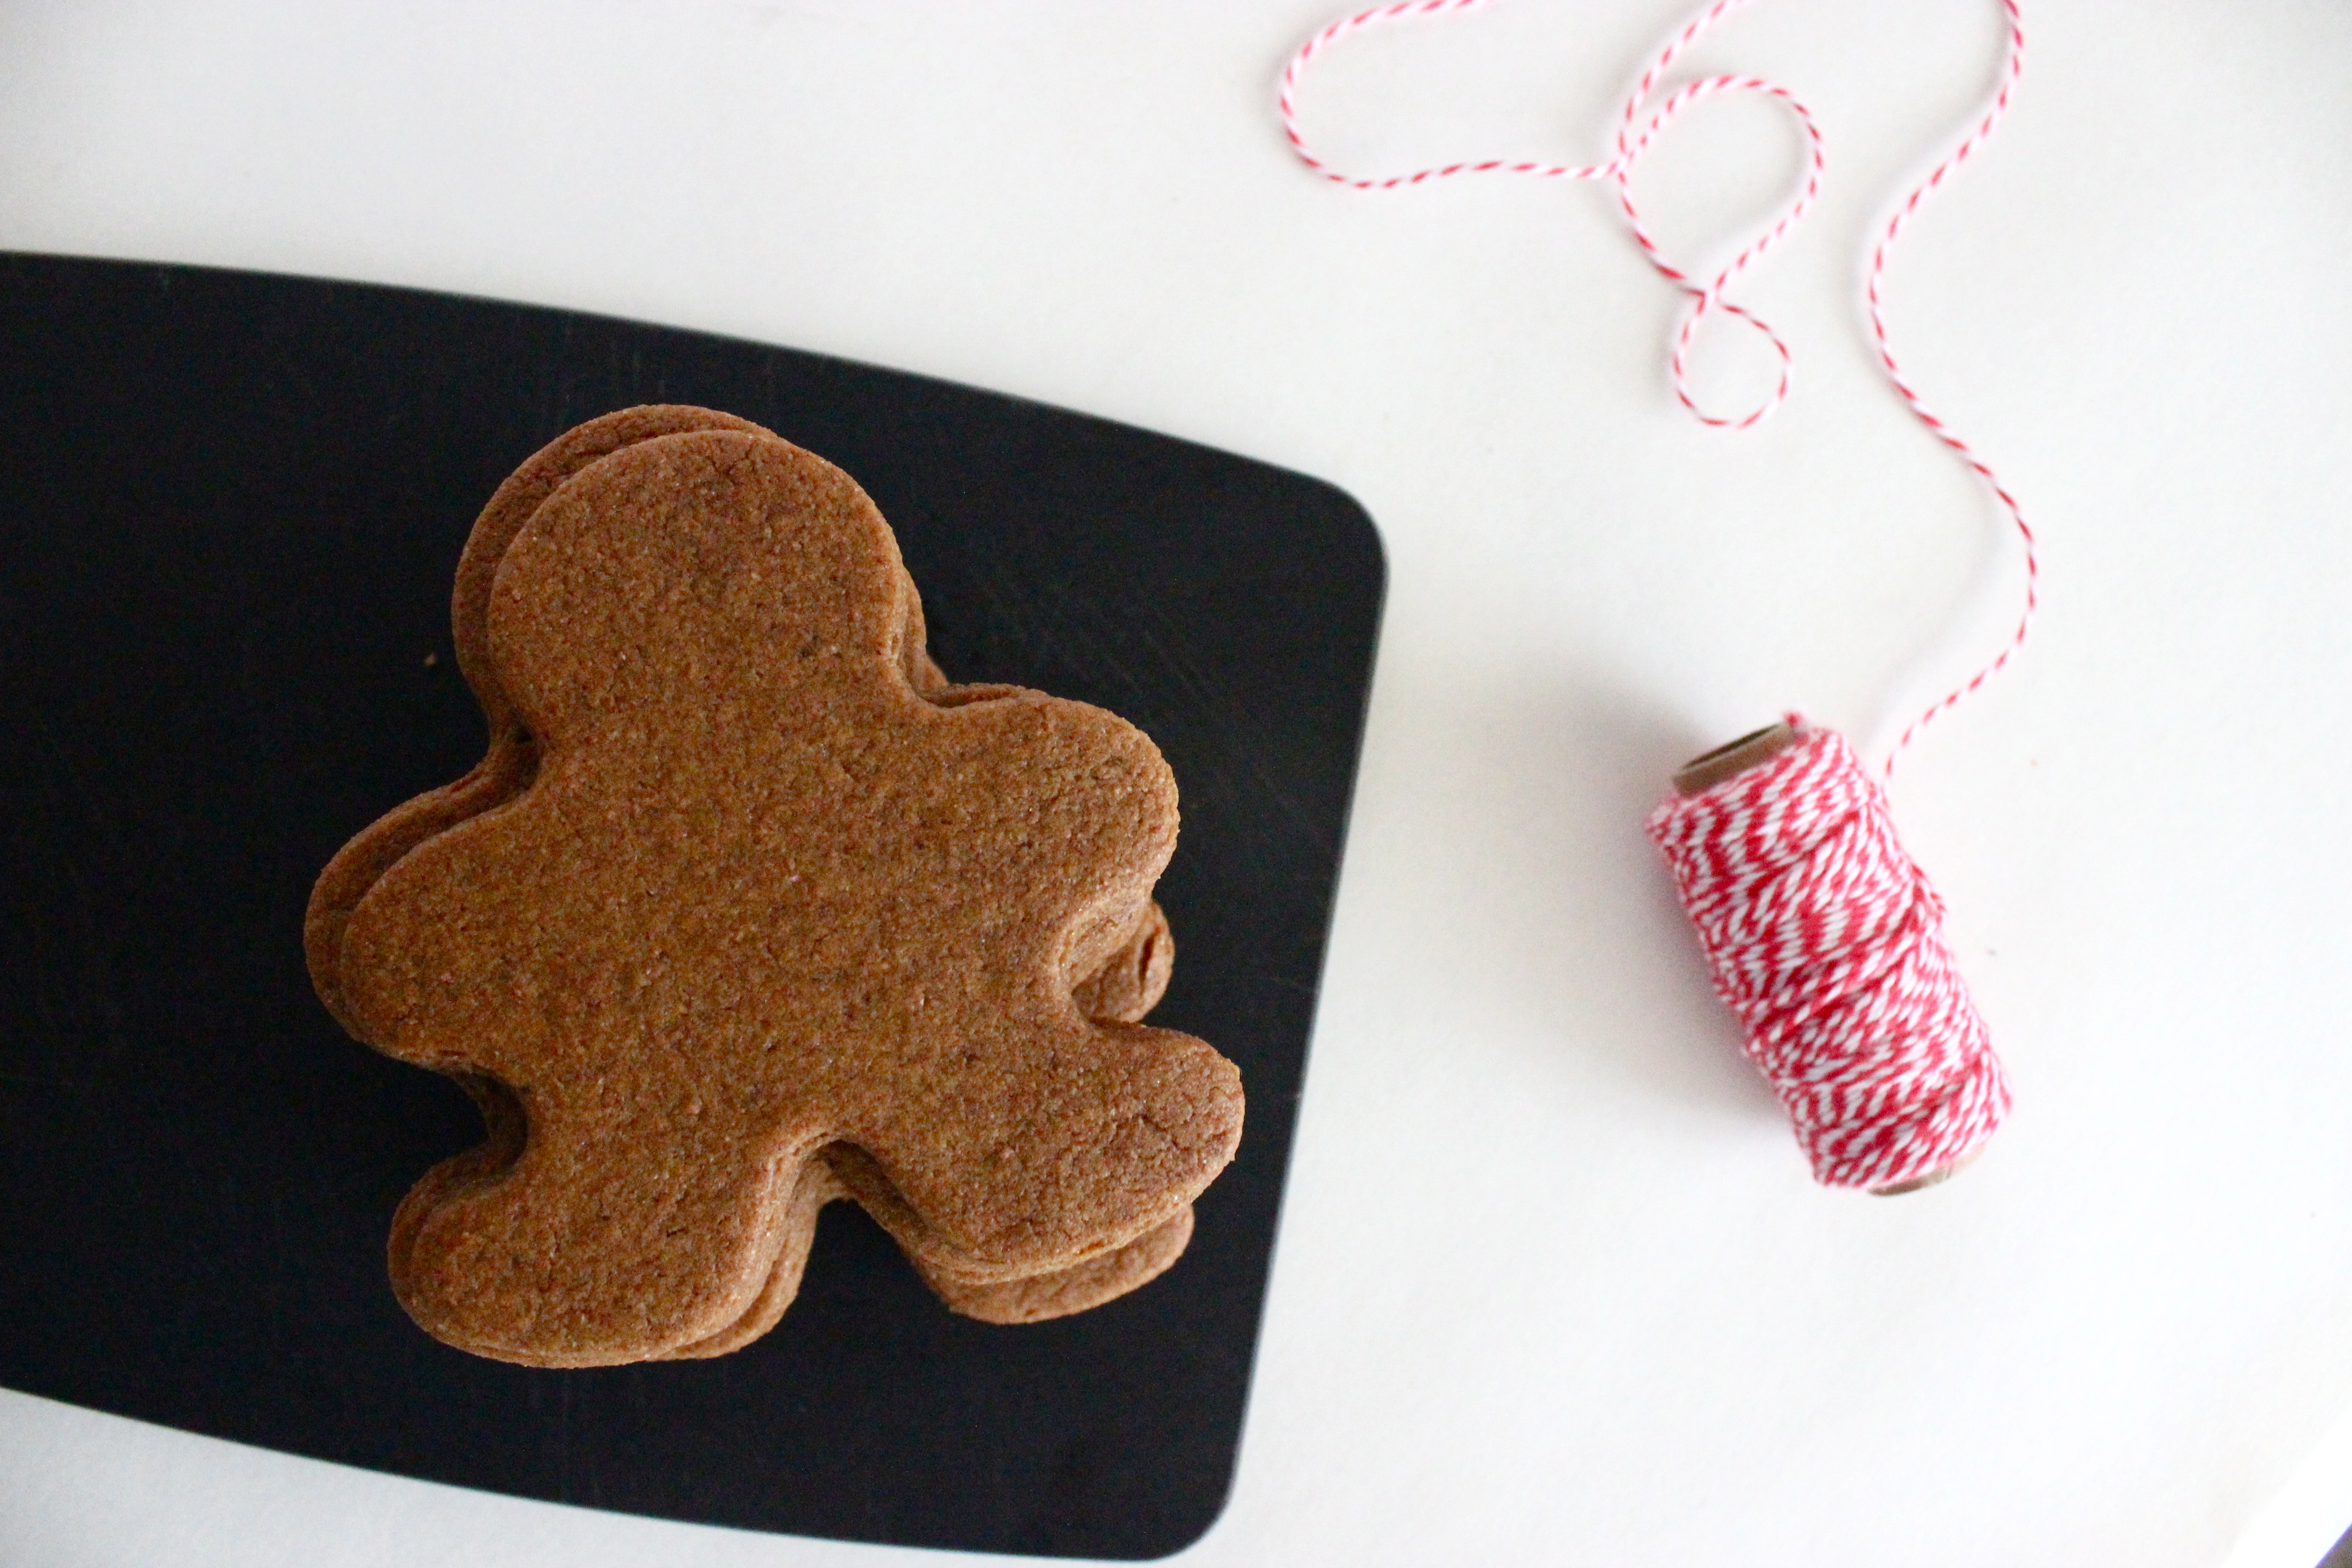
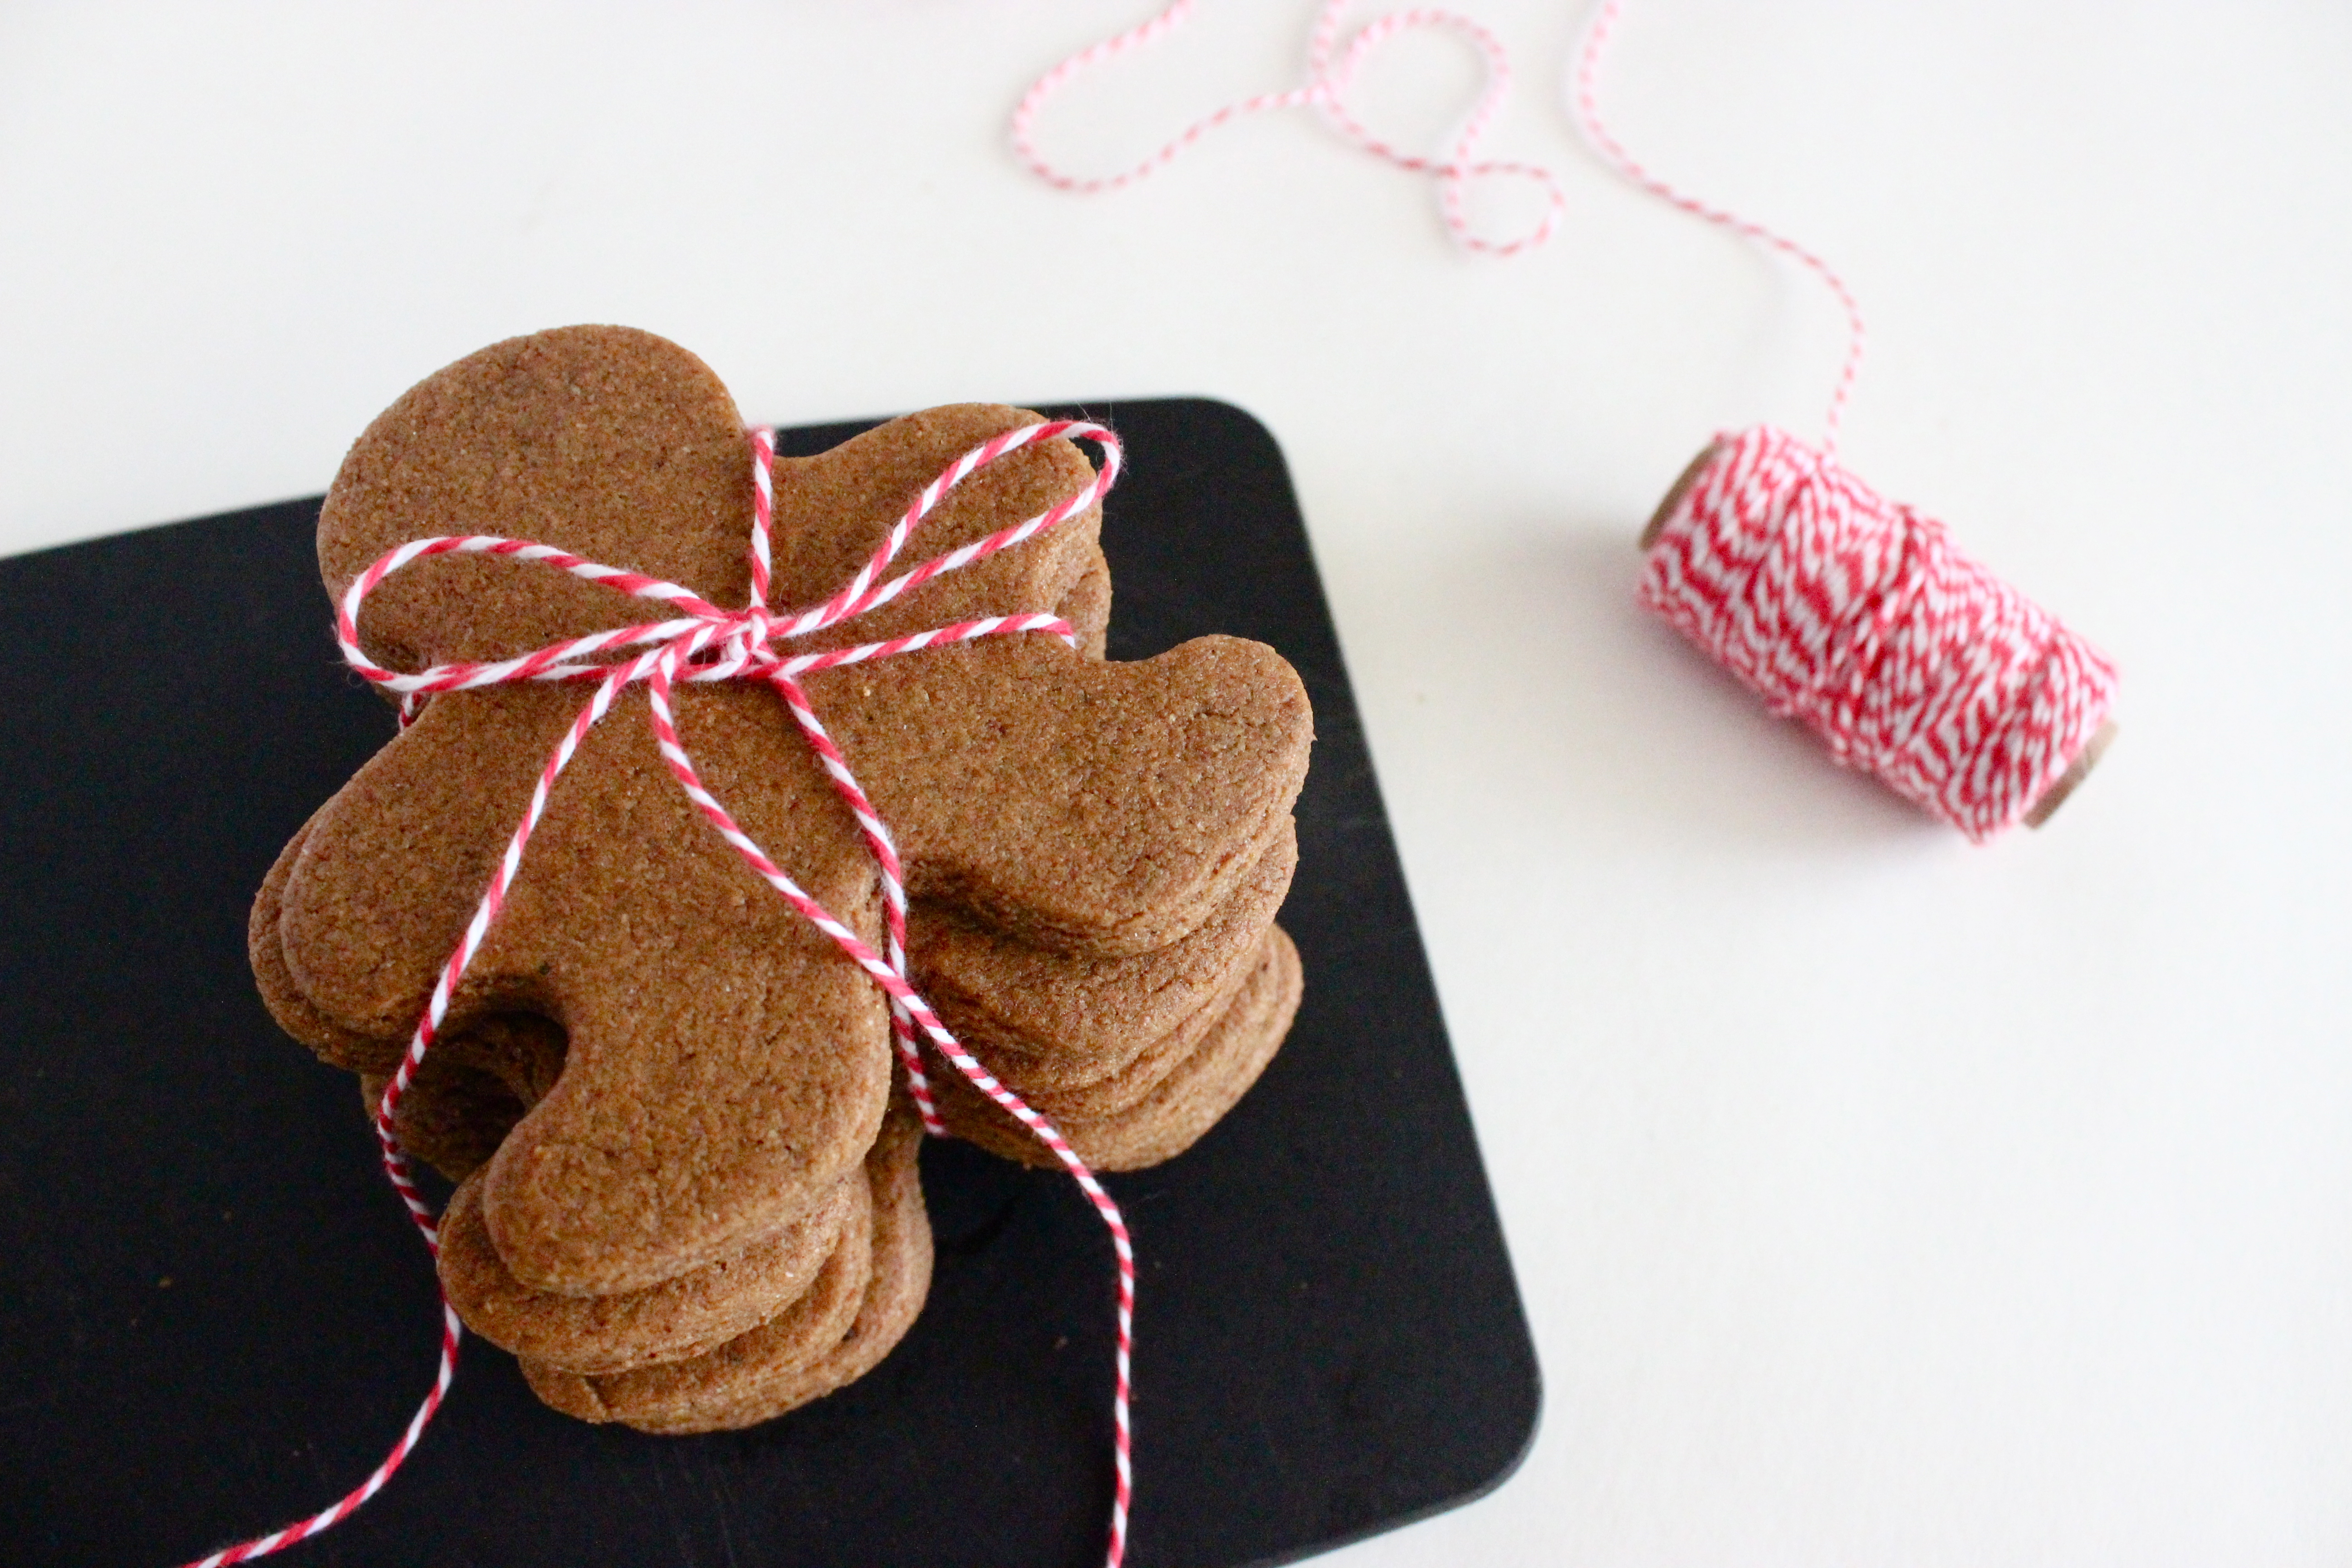
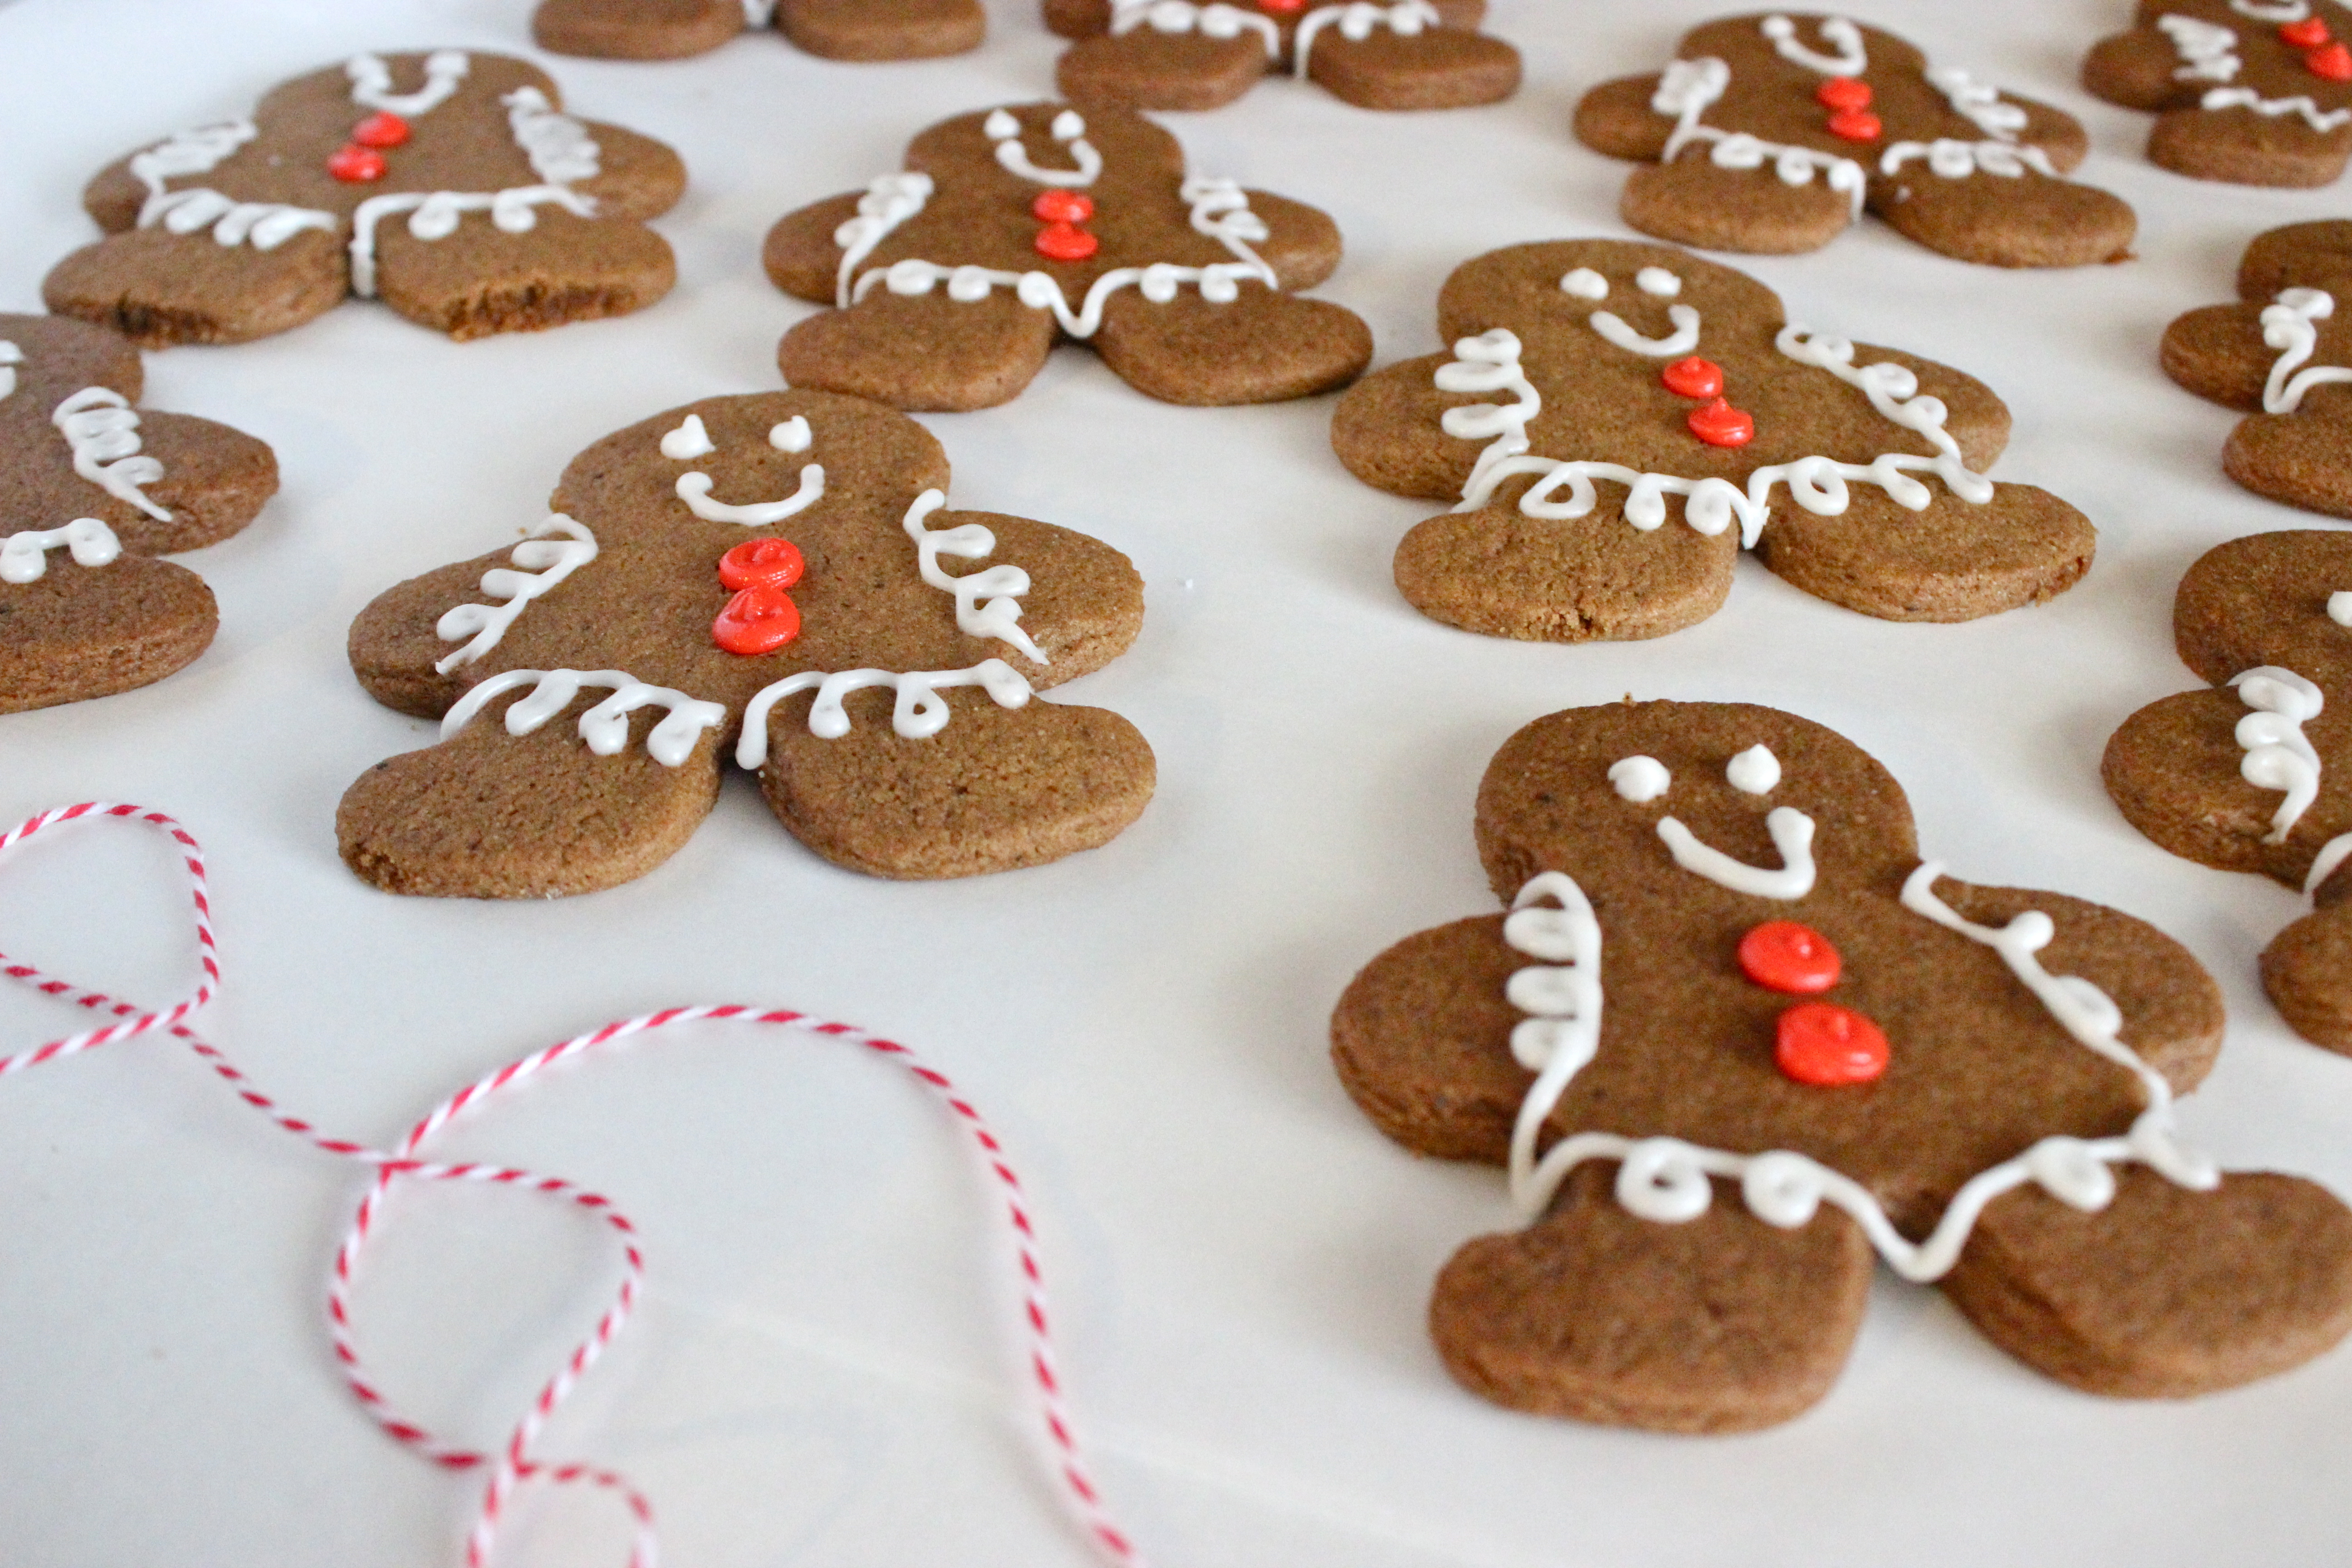
To round this out, these cookies are my favorite to bring to cookie swap parties (remember those?). The ingredients are quite simple but they look a lot more fancy than that. Wishing you and your families a safe and healthy 2021!

Ingredients

  • 1 ⅔ c all-purpose flour
  • 1 tsp baking soda
  • ½ tsp salt
  • ¼ tsp freshly grated nutmeg
  • ½ c unsalted butter, at room temperature
  • ½ c granulated sugar, plus more for coating
  • ⅓ c packed light brown sugar
  • 1 tsp pure vanilla extract
  • 1 large egg
  • ¾ c creamy peanut butter
  • 8 oz dark chocolate chunks or chips
  • 2 tbs coconut oil
  • 3 tbs coarse sea salt
  • ⅓ c roasted peanuts, coarsely chopped

Method

  1. In a bowl, whisk together the flour, baking soda, salt, and nutmeg and set aside.
  2. Using a stand mixer or a handheld mixer, cream together the butter and sugars on medium speed until light and fluffy (about 3 minutes). Stop the mixer and scrape down the sides of the bowl. Add the vanilla extract and egg and beat on medium speed until combined (about 2 minutes). Add the peanut butter and beat until just combined.
  3. Add the dry ingredients all at once and beat on low speed until just combined. Remove the bowl from the mixer and finish mixing with a spatula.
  4. Place the cookie dough in a plastic bag and refrigerate for 30 minutes.
  5. Preheat the oven to 350°F while the cookie dough chills. Line two baking sheets with parchment paper and set aside.
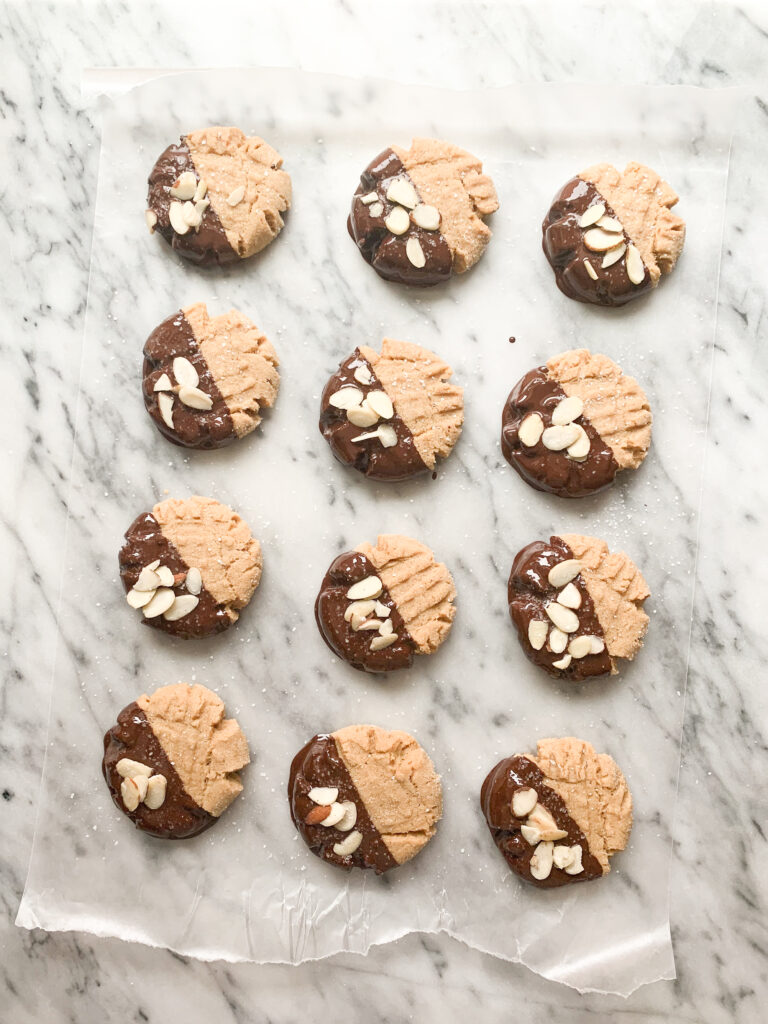
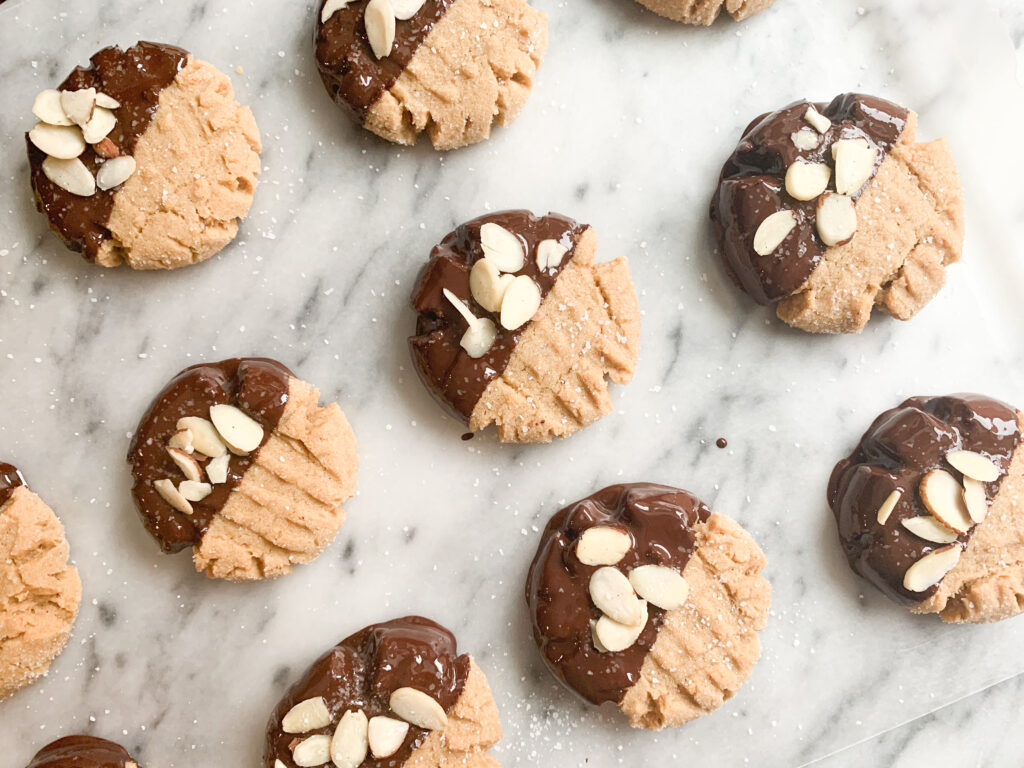
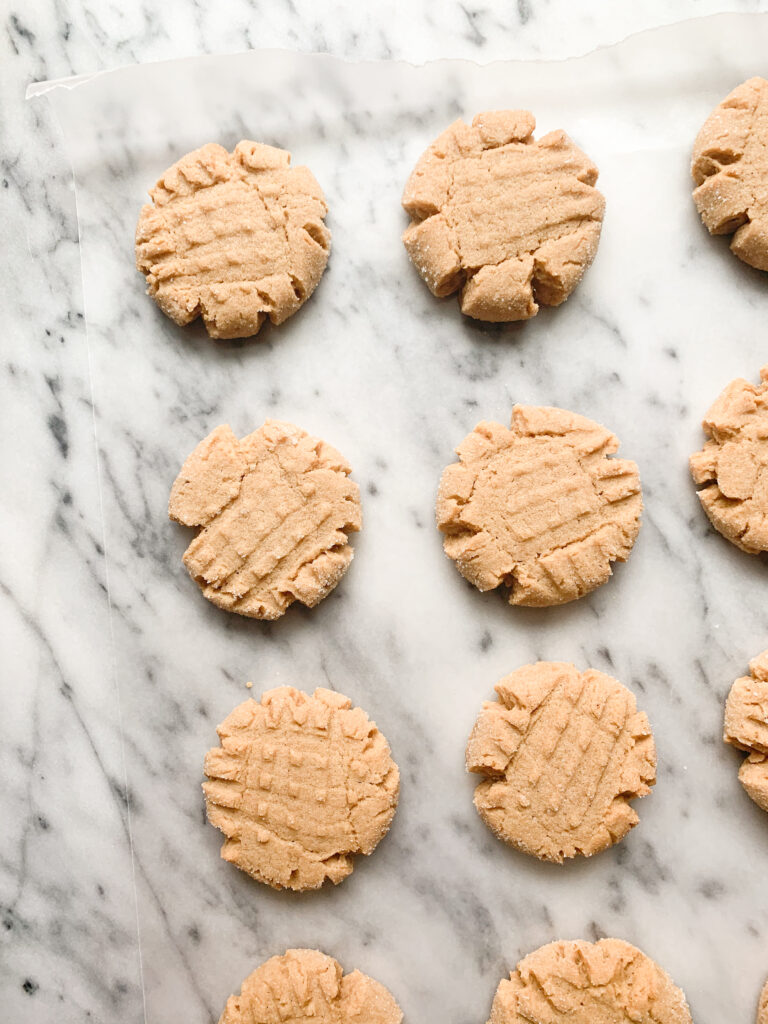
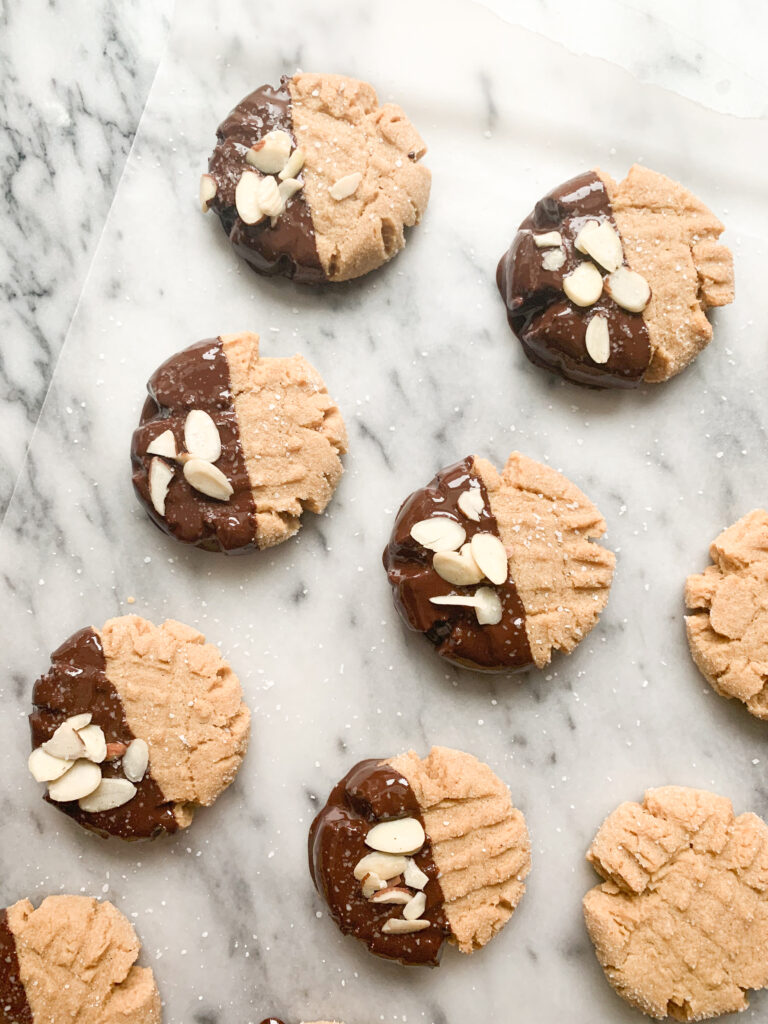
  6. Once the cookie dough has chilled, remove from the refrigerator. Gently roll the dough into balls (about tablespoon-sized) and coat in sugar. Place the sugar-coated balls on the prepared baking sheet and use a fork to mark the cookies with a cross-hatch pattern. Place cookies on the sheet about 1-inch apart.
  7. Place the baking sheets in the oven and bake for 10-12 minutes, until golden brown. Allow the baked cookies to cool for 5 minutes and then place on a wire rack to cool completely.
  8. Melt the chocolate and coconut oil in the microwave. Microwave 20-30 seconds at a time (to avoid burning), stir until completely smooth and combined. Place in a small but deep bowl for dipping.
  9. Place the salt and chopped peanuts in separate bowls near your dipping area. Dip the cookies halfway into the melted chocolate and place on a parchment lined tray. Sprinkle with chopped nuts and a bit of sea salt. Place in the refrigerator to harden the chocolate.

– Corinna

Butternut squash soup

Friends, it’s officially fall! I know how basic this sounds, but fall truly is my favorite season.

Fall in Texas feels a little different than what we got used to over the last five years living in Colorado. Although the change in temperature isn’t as drastic, it’s been amazing to get a break from the hot summer heat (buh bye, 90+ degree days!). Even in Texas, you can feel the air start to get that “crisp” feeling and something about the clear change in season welcomes a fresh start and the opportunity to hit that reset button.

As soon as September hits, I find myself craving all things orange – sweet potatoes, pumpkin, carrots, butternut squash, you name it! Also, I’m always happy to bring hot soups back into our meal routine. After all, who wants to eat hot soup when it’s blazing hot outside?

Today I’m sharing an incredibly simple vegan (and pretty healthy) butternut squash soup. I’d venture to say that this is the quintessential “fall soup” of soups. In our home, we like doubling this recipe and freezing single servings to eat throughout the week as a quick lunch. It pairs perfectly with a side salad (think kale, roasted sweet potatoes, sprinkled with pepitas kind of salad) or with a side of crusty bread. Need I say more?

Ingredients

  • 3 tbs olive oil
  • 1 large yellow onion, chopped
  • 1 tsp sea salt
  • 1 3 lbs butternut squash, cubed (or 3 16 oz bags of frozen butternut squash)
  • 4 garlic cloves, minced
  • 2 tbs fresh sage, finely chopped
  • 1 tbs fresh rosemary, finely chopped
  • 2 tsp fresh ginger, grated
  • 4 c vegetable broth
  • ½ of a 14oz can of unsweetened coconut milk
  • salt and pepper to taste
  • Optional toppings: fresh herbs, roasted pepitas, hemp seeds, etc.

Method

  1. In a large pot, heat the olive oil over medium heat. Add the onion and salt and sauté until the onion begins to appear soft and translucent. Add the squash and cook until it begins to soften, stirring occasionally.
  2. Add the garlic, sage, rosemary, and ginger and, stirring gently, cook until fragrant (about 1 minute).
  3. Add the broth and bring to a boil. Cook until the squash is tender (about 30 minutes).
  4. Remove from heat and let cool slightly. Add the coconut milk and stir until evenly combined. Pour the soup into a blender, working in batches if necessary, and blend until smooth. Season to taste with salt and pepper.
  5. Serve topped with roasted pepitas, hemp seeds, etc.

– Corinna

Easy cinnamon rolls

I used to have this preconceived notion that cinnamon rolls were one of those things that you could only get from a bakery because you needed some sort of special machine to actually make the roll. To my surprise, not too long ago I discovered that I could (quite easily) make them at home without the need for any fancy equipment.

Although I wished we lived in some alternate universe where cinnamon rolls were considered a healthy breakfast, I’m all for “everything in moderation.” These are the perfect occasional indulgence to satisfy a sweet tooth or something to bring to your next potluck brunch. These rolls, together with your morning coffee, are sure to become your next guilty pleasure.

Ingredients

Dough

  • ½ c warm water
  • 1 package active dry yeast (about 2 ¼ tsp)
  • 1 tsp sugar
  • 2 ¾ c all-purpose flour, plus more for kneading the dough
  • ⅓ c coconut oil, melted
  • ½ c almond milk
  • ⅓ c cane sugar
  • 1 tsp sea salt

Filling

  • 3 tbs coconut oil, melted
  • ½ c brown sugar
  • 1 ½ tbs cinnamon

Glaze

  • 1 ½ c powdered sugar
  • 3 tbs almond milk, plus more if needed
  • ½ tsp vanilla extract

Method

  1. In a small bowl, gently mix the warm water, yeast, and sugar. Set aside for approximately 5 minutes or until the mixture begins to foam and bubble.
  2. In a medium bowl, combine the coconut oil, almond milk, yeast mixture, sugar, and salt. Place the flour in a separate large bowl and then add the yeast mixture – stir until combined. Using your hands, knead the mixture inside the bowl (it will be sticky). Transfer the dough onto a floured surface and knead for about 3 minutes. As you knead, continue to sprinkle with flour until a smooth ball is formed. Place the dough inside a large bowl, cover with a towel or lid, and set aside in a warm place until the dough doubles in size (about an hour).
  3. Punch down the dough and roll out on a floured surface into a 20×12-inch rectangle. In a small bowl, mix the brown sugar and cinnamon. Brush the dough with the 3 tablespoons of melted coconut oil and sprinkle the cinnamon sugar evenly over the rolled out dough.
  4. Starting with the short edge of the dough, roll the dough tightly into a log. Slide the log into 12 even rolls. Place the rolls into a greased baking dish, cover, and let rise for one hour.
  5. Preheat the oven to 350°F.
  6. In a medium bowl, whisk together the powdered sugar, almond milk, and vanilla until smooth. If it’s too thick, add more almond milk as needed.
  7. Bake the rolls 25 – 30 minutes or until lightly golden on top. Remove and allow to cool for 10 minutes, then drizzle the glaze on top.

– Corinna

Vegetable spring rolls with peanut sauce

Despite how much grief I sometimes give my husband over how plain some of the food he eats is, there are a handful of foods I didn’t really start eating until I met him. Although I don’t remember the exact moment, I’m fairly confident I ate my first spring roll with Andrew.

This is one of those foods that gets picked up in the regular rotation of weekly meals and sticks around for a while. I love that you can prep most of the ingredients in advance and assemble when you’re ready to eat. It is also one of those meals that feels fresh and healthy for days when you want to get an extra serving of vegetables. However, what really makes this dish shine is the peanut sauce. Believe it or not, peanut sauce is surprisingly easy to make at home and is quite versatile. This is the same peanut sauce recipe I use for my breaded tofu recipe in place of sweet n’ sour sauce.

Ingredients

Spring Rolls

  • spring roll rice paper wrappers
  • cooked vermicelli noodles
  • romaine lettuce, chopped into ~4 in. long sections
  • carrots, julienned
  • cucumber, julienned
  • red cabbage, thinly sliced
  • fresh mint
  • basil
  • wide bowl filled with warm water

Marinated Seared Tofu (optional)

  • 1 14 oz block of extra firm tofu
  • 2 tbs soy sauce or tamari
  • 1 tbs olive oil
  • 1 tbs lemon juice
  • 2 garlic cloves, minced
  • 1 tsp fresh ginger, minced
  • black pepper, ground

Peanut Sauce

  • ¾ c creamy peanut butter
  • ¼ c white or rice vinegar
  • ⅓ c soy sauce or tamari
  • 3 tbs honey
  • 1 tsp fresh ginger, peeled and grated
  • 2 garlic cloves, minced
  • ¼ teaspoon red pepper flakes
  • ½ c water, plus more until you reach your desired consistency

Method

Marinated Seared Tofu (optional)

  1. If you choose to make the marinated seared tofu, drain the tofu and slice it into 1/2-inch slices. Place it on a towel and gently pat dry to remove excess water.
  2. In a shallow bowl, whisk together the soy sauce / tamari, olive oil, lemon juice, garlic, ginger, and black pepper.
  3. Place the tofu the marinade bowl and flip to fully coat it. Marinate for at least 15 minutes. I sometimes marinate overnight – this something you can prep a day ahead.
  4. Heat a skillet to medium-high heat. Add a little oil to the pan and place the tofu pieces with enough space between each so that there’s space in between each piece. Without moving the tofu slices around too much, let them cook for a few minutes on each side until they’re golden brown and caramelized around the edges.
  5. Remove from heat and set aside to cool.

Spring Rolls

  1. Working one at a time, wet rice paper in warm water for 10-15 seconds (until soft and pliable) and transfer to a work surface (I like to work on top of a dish towel as the rice paper is less likely to stick to it compared to a smooth surface).
  2. Place the lettuce flat in the center of the rice paper and evenly place your your fillings of choice (noodles, vegetables, tofu, herbs, etc.) in the same direction on top of the lettuce. I like to use the lettuce together with. the rice paper to form a sturdier spring roll that actually holds together.
  3. Bring the bottom edge of the rice paper tightly over the filling and then folding in the sides, roll from bottom to top until the top of the sheet is reached, being careful not to tear the rice paper. Repeat with remaining wrappers and filling.

Peanut Sauce

  1. To make the peanut sauce, in a blender, mix all the ingredients together until smooth. Add two tablespoon of water at a time until desired consistency is reached.
  2. To adjust flavor, add more soy sauce / tamari for a more savory flavor or extra honey for a sweeter flavor.

– Corinna

My favorite breading method featuring sweet n’ sour tofu rice bowls

fullsizeoutput_1e6

About once a year, I hop back on here and say something like “I’m back for good!” I admit it, I’m not consistent on here but still hope to be one day. Given how 2020 is shaping up to be, this could be the year! A lot has happened since my last post on here, but those are all stories for another day (i.e., we’re back in Texas, we adopted a sweet stray pup, and we’ve been spending at least a good solid 22 hours a day inside our 1 bedroom apartment for the last five weeks due to the coronavirus pandemic, etc.). It’s only April and what a year it has been already.

Like many of you, we suddenly have quite a bit of extra time on our hands lately. I’d hate to pretend or give the impression that this is what every day for the last five weeks has been looking like for us. Somedays I cook a lot, somedays I’m just overwhelmed by everything that is happening and all the uncertainty around me, other days I manage to not think much about it. But again, that’s for another day.

Today I’m sharing a my all-time favorite breading method. This breading method, that is meant to be used in place of “battering and deep frying,” was about eight to nine years in the making. It kinda started when I first became a vegetarian circa 2011 and I discovered Wheatsville Co-op’s buffalo popcorn tofu in Austin Texas. Y’ALL… many years later, I’m still so in love with that stuff. To make a long story short, from the moment I tasted Wheatsville’s popcorn tofu, I became obsessed with both the tofu and recreating the recipe. There was a lot of trial and error, sometimes the flavor was right but the consistency and texture just wasn’t and other times I nailed the texture but the flavor was all wrong. Throughout this process I also realized that I also don’t enjoy deep frying things at home. It’s messy, it leaves your kitchen smelling like McDonald’s for days, and while I do still love a good french fry, I prefer to leave the fried goods for those times that we eat out from restaurants instead (ignorance is bliss, am I right?!). Same reason why I don’t think I’ll ever own a deep fryer.

To clarify, today I’m not sharing my recreation of the Wheatsville popcorn tofu, but rather, my gained knowledge from years of relentlessly trying to recreate it. Although we use a sweet n’ sour sauce for this recipe, you can swap that out for pretty much any pre-made sauce from the grocery store (we like to use peanut sauce sometimes). Also note that this breading method isn’t just great for tofu, it works amazing on butternut squash, sweet potatoes, eggplant, cauliflower, etc. I will also warn you that it is a bit time consuming and a little messy so I would recommend doing a lot at once (economies of scale… since you’re going through the hassle already) and freezing a portion of the breaded tofu or vegetables before coating in any sauce. Once you’re ready bake, move from the freezer to the refrigerator to thaw overnight, stick in the oven a few minutes to warm up and make sure the inside isn’t frozen, and then pickup at the sauce coating step. So let’s get started!

fullsizeoutput_1eb
Ingredients
Sweet n’ Sour Sauce 
  • 2 tbs arrowroot powder (or cornstarch powder) mixed with 2 tbs water
  • 3 tsp sesame oil (or vegetable oil)
  • 3 garlic cloves, minced
  • 1 tsp fresh ginger, grated
  • ½ tsp red pepper flakes
  • ½ c white vinegar (regular, white wine, or rice vinegar)
  • ¾ c water
  • ⅔ c maple syrup (or honey, agave nectar, sugar)
  • 3 tbs tomato paste
  • 3 tbs soy sauce (or tamari, coconut aminos)
  • ½ tsp sea salt
Breaded Tofu
  • 1 14 oz block of extra firm tofu
  • ½ c unsweetened plain almond milk (or milk of choice, just make sure it’s plain and unsweetened)
  • ¾ c all purpose flour (or gluten-free flour)
  • 1 ½ c breadcrumb mixture, ¾ c panko crumbs + ¾ c plain breadcrumbs (or gluten-free breadcrumb alternatives)
  • extra-virgin olive oil, for drizzling
For Serving (optional)
  • rice
  • roasted vegetables of choice (we used carrots and broccoli)
  • cilantro, chopped
  • green onions
  • soy sauce
  • sriracha sauce
Method
Sweet n’ Sour Sauce 
  1. Mix the the arrowroot powder and cornstarch and set aside.
  2. In a small saucepan, heat the oil over medium heat. Add the garlic, ginger, and red pepper flakes and stir until fragrant and being careful not to burn the garlic or ginger (about 30 seconds to a minute).
  3. Add in the remaining sauce ingredients and whisk together over medium heat until just bubbling. Then whisk in the cornstarch and water mixture. Whisk frequently for 10 to 12 minutes until thickened and reduced. Remove from the heat and set aside while you bread and bake the tofu.
Breaded Tofu
  1. Preheat oven to 425 °F.
  2. Prepare the tofu: Drain and gently press excess moisture from tofu over a kitchen sink. I find that freezing the tofu when I buy it and then moving it to the refrigerator the night before I use, changes the consistency of the tofu  in a way that makes it easier to squeeze that extra moisture without falling apart (freezing the tofu almost gives it a “sponge-like” consistency). Slice the tofu into 1-inch cubes.
  3. Breading: In three separate bowls, place 1) the flour 2) the plain almond milk and 3) the breadcrumb mixture. First, coat each piece of tofu evenly with flour by pressing each side of the tofu into the flour bowl. Second, dip each piece of flour-coated tofu into the almond milk bowl so that the outside of the tofu becomes sticky and tacky (be careful not to submerge for too long or the flour will just fall off). Third, transfer the sticky tofu cube into the breadcrumb bowl and, with a spoon, press the breadcrumbs to coat the tofu evenly. The mixture of panko and plain breadcrumbs is what will help us achieve an even and crispy coat.
  4. Bake: Place the breaded tofu on a parchment lined baking sheet and lightly drizzle with olive oil. Bake for 20-25 minutes. About halfway through the baking time, flip each piece and drizzle with olive oil again and bake for the remaining time (or until lightly browned at the edges – see middle image below). Take the tofu out of the oven and let it cool for a couple of minutes and, using a silicon brush, evenly brush the sweet n’ sour sauce evenly on each piece. You can also take a spoon and submerge a few pieces of tofu at a time into the saucepan and transfer back to the baking sheet. Place back in the oven and bake for no more than 5 minutes – be careful not to burn the sauce. This extra steps allows the sauce to really stick to the tofu and creates that crispy texture (see third image below). Remove from oven and allow to tofu to cool over the baking sheet before serving.
Recipe Notes
  • You can serve these over a bed of rice and roasted or stir fried vegetables. We topped with coconut aminos (a great  low sodium soy sauce alternative), sriracha sauce, cilantro, green onions, and a squeeze of lime.
  • This method is very versatile and works on a number of things in place of deep frying. I’ve used this method to bread butternut squash for tacos, on cauliflower to make buffalo bbq cauliflower “wings,” on eggplant to make eggplant parmesan, etc.

 – Corinna

Everything minus the bagel seasoning

IMG_3308It wasn’t until November of last year that I would’ve quite confidently told you that bagels simply weren’t my thing. I was of the opinion that there was way too much chewing involved with a reward that just wasn’t worth the strenuous jaw work. Dramatic, I know. All that was before we arrived at the airport that Wednesday before Thanksgiving of last year. My husband, having a profound love for bagels that I never quite understood, suggested we grab a quick bite before boarding our flight. We stopped at a small shop with muffins, cookies, and bagels. I went ahead and ordered the usual, a whole wheat bagel. We found a place to sit by our gate to sit down and eat our meal before boarding the plane. As I was chewing through my own bagel I couldn’t help but catch a savory whiff of whatever Andrew was chewing on. To my own surprise, I asked if I could have a bite of what turned out to be an everything bagel – and there was no turning back.

Needless to say, my world was flipped upon taking that first bite from an everything bagel. Now I understood what all the bagel hype was about. From that moment onward, it’s as if I needed to make up for all that lost time and have all the uneaten everything bagels I’d forgone. This revelation came to me at a time when I was approximately two weeks away from a big exam and if you’re anything like me, studying makes you hungry (even five minutes after you just ate!) simply because the mind wants to procrastinate. My addiction grew quickly and I was having two, or sometimes three, bagels a day. I told myself that once my exam was over, I couldn’t be having multiple bagels a day. This was a real problem.

We are now past my exam and the bagels had to go cold turkey. That is what inspired this post. In desperate search for an alternative (or need to fill that void), I remembered hearing about Trader Joe’s everything but the bagel seasoning. It’s genius if you ask me but unfortunately, the nearest TJ’s is pretty out of the way from where I live. After some research I quickly realized that this seasoning is simply a mixture of relatively easy to find ingredients from any grocery store. My favorite way to have this is sprinkled over avocado toast but I’m sure it’s just as tasty over a salad. Let me know if you try this and any creative ways in which you use this seasoning. Enjoy!

IMG_3304

IMG_3316IMG_3320Ingredients

  • 2 tbs poppy seeds
  • 1 tbs white sesame seeds
  • 1 tbs black sesame seeds
  • 1 tbs hemp seeds
  • 1½ tbs dried minced garlic
  • 1½ tbs dried minced onion
  • 2 tsp salt

Instructions 

  1. In a bowl or jar, measure and mix all ingredients. Stir until well combined.
  2. Store in a sealed container and enjoy by sprinkling over just about any savory dish.

– Corinna

Rice krispie treats

IMG_9244

In my book, the real reason Valentine’s Day is even a holiday is because we all needed a good excuse to break our New Year’s resolution diets. What better way of doing so than in the name of love? Am I right!? Speaking of New Year’s resolutions – it is mine to create more blog content and post more often than twice a year! (Check out the post right before this one, dated from almost a year ago.)

If you haven’t already gathered, I have a sweet tooth. In fact, one of the most exciting things to me upon embarking this vegan journey (not sure what else to call it) was discovering new ways to create sweet treats that were just as delicious as their non-vegan counterparts. I’ve always really enjoyed coming across recipes of people making ‘knock-offs’ (I mean that as a compliment!) of store bought treats in their own kitchen (think Little Debbie snacks, Nutter Butters, etc.). I love thinking up of ways of veganizing dishes I enjoyed from my pre-vegetarian days. Well, these treats are just that kind of fun – they’re the veganized knock-off of the Kellogg’s Rice Krispie treat!

IMG_9256 IMG_9262

Ingredients

  • 1 10 oz bag of vegan marshmallows (I used Dandies Marshmallows, can be found at Whole Foods. Sub regular marshmallows if not vegan.)
  • 5 c crisp rice cereal
  • 2 tbs vegan butter (such Earth Balance or Smart Balance)
  • 2 tbs coconut oil + ½ tbs for melting chocolate chips
  • 1 c vegan semisweet chocolate chips (optional, for coating)

Instructions 

  1. In a microwave safe bowl, combine marshmallows, butter, and coconut oil. Microwave in 30-second intervals, stir between each microwave. Repeat until marshmallows are fully melted. (You can also do this over the stove using a saucer pan. In a saucer pan over medium heat, combine marshmallows, butter, and coconuts oil. Stir until marshmallows are completely melted.)
  2. Mix in cereal and combine mixture until all the cereal is evenly coated with the marshmallow mixture.
  3. Press mixture into a 9″ X 9″ pan. Once cool, cut into squares or into desired shapes using a cookie cutter.
  4. In a sauce pan over low heat, combine chocolate chips with ½ tbs of coconut and stir continuously until melted.
  5. Drizzle chocolate (or topping of choice) over treats.

– Corinna


Almond thumbprint cookies

IMG_5698

Let’s be honest, if it weren’t for Pinterest I would feel pretty indifferent about Valentine’s Day – but with more festive recipes than I could ever possibly scroll through and red & pink DIYs galore, how can anyone resist?! For me, Valentine’s Day (or any other holiday, really) serves as a good excuse to stay in and put together something extra special in the kitchen. By special, I’m usually referring to sweets. I suffer from major sweet tooth, so for the most part, I try my best to keep sweets out of the house and refrain from making any… unless there’s a special occasion.

The recipe for these cookies is perhaps one of the most simple cookie recipes you will ever follow and its simplicity certainly does not compromise taste. I took some of these cookies to share at work a few days ago and they were quite a hit. The best part, if you ask me, is that they’re vegan. So that makes them healthy, right?

IMG_5666IMG_5676
IMG_5692
IMG_5707IMG_5697

Ingredients

Cookies

  • 2 c + 2 tbsp unbleached all-purpose flour
  • 1 c vegan butter (such Earth Balance or Smart Balance), at room temperature
  • ⅔ c granulated sugar
  • 1 tsp vanilla
  • ½ tsp almond extract (replace with vanilla if allergic)
  • raspberry jam (or jam of choice)

Glaze

  • 1 c powdered sugar
  • 1 – 2 tbsp almond milk (or milk of choice)
  • 1 tbs almond extract (replace with vanilla if allergic)

Instructions 

Cookies

  1. Preheat ove to 350 °F.
  2. With a handheld or stand mixer, beat the butter until creamy (~1-2 minutes).
  3. Add the sugar, vanilla, and almond extract to the creamed butter and mix into well incorporated.
  4. Add flour and mix at lower speed until a soft dough is formed. You don’t want to over-beat the dough.
  5. Place the dough in a zipper freezer bag while you make the glaze.
  6. After making the glaze, remove dough from freezer and begin to form balls out of the dough (~1 tbsp of dough per ball). Place on a parchment-lined baking sheet.*
  7. With your thumb, form an indentation in the center of each ball and fill with jam of choice.
  8. Bake for about 12-15 minutes or until golden brown at the edges.
  9. Let cookies cool for about 30 minutes before applying glaze.

*Parchment paper is not necessary but if you’ve never used it before, you’re missing out! Otherwise, lightly spray sheet with non-stick cooking spray.

Glaze

  1. In a bowl, add the powdered sugar, one tablespoon of almond milk, and almond extract and mix together. Slowly add more almond milk as you mix until you reach the desired consistency.
  2. Scoop glaze into a small zipper bag. Drizzle glaze over cookies by cutting a small corner of the zipper bag and pushing glaze through the bag’s hole.

– Corinna

Beet burgers

IMG_5601
Before I get to the beet burgers I will start off by saying, I’m really not good at this whole blogging thing. To be completely honest, I didn’t really expect the whole process to be as time consuming as it has turned out to be. By “the whole process,” I really do mean a whole process. This whole process involves quite a few steps.

1. The idea inception phase. Sometimes I have more ideas than others.

2. Once I have a great idea, finding the time to execute this great idea becomes a challenge. As I may have previously mentioned, I have a full-time job.

3. Testing out a recipe and shooting the whole process. Believe it or not, taking photos is a lot more time consuming (for me, at least) than it may seem. I would say that pretty much anything I cook takes about twice as long when there’s a camera involved. Additionally, there’s the time of the year to factor in. Natural daylight produces better images but because it’s winter, I can only take advantage of daylight hours over the weekend when I don’t work (sun sets ~5 PM).

4. Quality control. Let’s say I had a great idea, great light, and great photos. At that point, I just have to hope the final product is just as great. I’ve actually taken photos of recipes in the past but haven’t shared because I didn’t think they tasted great.

5. Finally, editing and posting.

I’m not trying to throw myself a pity party over here. Just know that I’m working on it and I haven’t forgotten about this space.

Now… to the beet burgers. I’m sure by now you’ve gathered I’m a vegetarian. Actually, I’m (an almost full-time) vegan. I don’t like to say I’m a full-time vegan because I’m pretty sure I unknowingly eat traces of egg and milk (hidden ingredients in a lot of food) here and there that I don’t know about but for the most part, I try my best to stick to a vegan diet. Now, I’m not here to tell you why should be a vegetarian yourself or anything like that. My only hope is that these recipe posts inspire you to incorporate more plant-based recipes into your day-to-day. This recipe specifically was inspired by a beet burger I had last week at a local Denver restaurant . Beets weren’t exactly something I ate a whole lot of until recently that my husband and I moved from Texas to Colorado. Beets seem to be much more popular over here and I’m definitely not complaining. This beet patty has a great smoky tasty and is pretty easy to make. {Scroll down for full recipe.}

IMG_5560 IMG_5573 IMG_5580 
IMG_5598

Ingredients

Patties

  • 1 15oz can black beans
  • 1 15oz can beets
  • 1 15oz can chickpeas
  • 1½ c red onion, finely chopped
  • 1 c chickpea flour (or flour of choice)
  • ½ tsp paprika
  • 1 tsp cumin
  • ¼ tsp chili powder
  • salt and pepper to taste
  • ½ tsp vanilla

Other

  • burger buns
  • arugula and spinach for garnish, optional
  • avocado, optional

Instructions 

  1. Preheat oven to 350 °F.
  2. Finely chop beets and mix in a bowl with black beans and chickpeas. With a masher, mash beets, black beans, and chickpeas together. It’s okay to leave some whole pieces for texture.
  3. Mix in onion and spices. Add in chickpea flour and mix until it’s well incorporated.
    Form 2-3 inch patties and place over parchment lined baking sheet. Brush the top of the patties with olive oil and place in over for approximately 25-30 minutes. Remove patties about halfway through and flip. Recipe yields 8-10 patties. *
  4. Allow patties to cool down for a few minutes after removing from the oven.
  5. Assemble burgers with garnishes of choice.

* You can alternately cook these over the stove. Cook in pan with a little bit of olive oil for a few minutes until patties reach desired color.

– Corinna

Vegan gingerbread cookies

IMG_5300

Well, this is embarrassing. I just saw the date stamp on my last post and cringed at the realization that my last post was published two months ago. Truth is, life’s been busy! October and November happened way too quickly and now I can’t believe December is also coming to an end. In the last two months, there’s been a lot of traveling to visit family and friends, adjusting to work life and living in a new state, and the list goes on. While I still haven’t struck the perfect balance between maintaining a full-time job and keeping up with this site, I am trying my best to be more consistent.

That being said, IT’S DECEMBER! Christmas is, without a doubt, my favorite time of the year. Thinking of all festive gatherings and activities, decorative lights and garlands, and bright white snow (now that we live in Colorado) only makes my heart warm. Baking up some delicious Christmas cookies is always an easy and fun way to get into the Christmas spirit. With that, there’s just something about a classic gingerbread cookie that screams Christmas to me. For those of you still looking for Christmas cookie recipe, this one is perfect. I actually made several dozens of these to share with family and friends. You can also get creative with the shape -I made a few Texas longhorn shaped ones (hook ’em horns!) and some Baylor bears for my mother-in-law. Give it a try and be sure to share with me how yours turn out!

Last but not least, I wish you and your loved ones a Merry Christmas. Enjoy!

IMG_5285 IMG_5287 IMG_5291 IMG_5298 Ingredients

Cookies

  • 1⅓ c whole wheat flour
  • ¾ c unbleached all-purpose flour
  • ½ tbsp baking powder
  • 1 tsp baking soda
  • ½ tbsp cinnamon
  • 2 tsp ground ginger
  • ½ tsp nutmeg
  • ½ tsp ground cloves
  • ½ cup coconut oil
  • ½ cup + 1 tbsp brown sugar
  • ¼ cup water
  • ½ cup molasses
  • ½ tsp vanilla

Icing

  • 4 c powdered sugar
  • 1 tbsp light Karo syrup
  • 3 – 5 tbsp water
  • color of choice food coloring

Instructions 

Cookies

  1. In a bowl combine the flour, baking powder, baking soda, cinnamon, ginger, nutmeg and cloves and set aside.
  2. In a large bowl, cream together the coconut oil and the sugar with a hand or stand mixer. Beat until the mixture is nice and light. Add the water, molasses, and vanilla and beat until thoroughly mixed.
  3. Add the flour mixture gradually to the creamed sugar mixture and beat until well combined.
  4. Place the dough in a plastic re-sealable bag and refrigerate for about an hour (you can prepare the icing while you wait).
  5. Before rolling, let the dough sit at room temperature until it becomes softer and easier to roll.
  6. Preheat oven to 325 °F.
  7. Roll the dough directly onto parchment paper. The dough should be approximately ¼” thick. Use cookie cutters to cut out the dough.
  8. Bake for about 8-10 minutes, until the cookies are lightly browned around the edges and barely firm in the center.
  9. Let them cool completely before decorating.
  10. Beat all ingredients slowly adding the water in. (7-10 minutes at low speed with a heavy-duty mixer, 10-12 minutes at high speed with a hand-held mixer).

* For a softer/chewy cookie, store in an airtight container or store in a container with some ventilation for a crispier cookie.

Icing

  1. Beat all ingredients for approximately 10 minutes, slowly adding the water in.
  2. Add food coloring of choice and beat until color is evenly blended.

* Be careful to not add too much water into the icing, your icing should be of a thick consistency.

– Corinna